
Updated 24feb19
The beta Lynx was hardly flawless, but there were no show stoppers. As more people get a chance to ski the Lynx in 2019, things the beta team never found are being uncovered. In early February 2019 22 Designs issued a technical bulletin to deal with some of these. Most are notes on the proper care and feeding of the new cat in town. One is a warning worth heeding. A new flaw in the claw surfaced after this was first published (icing issues).
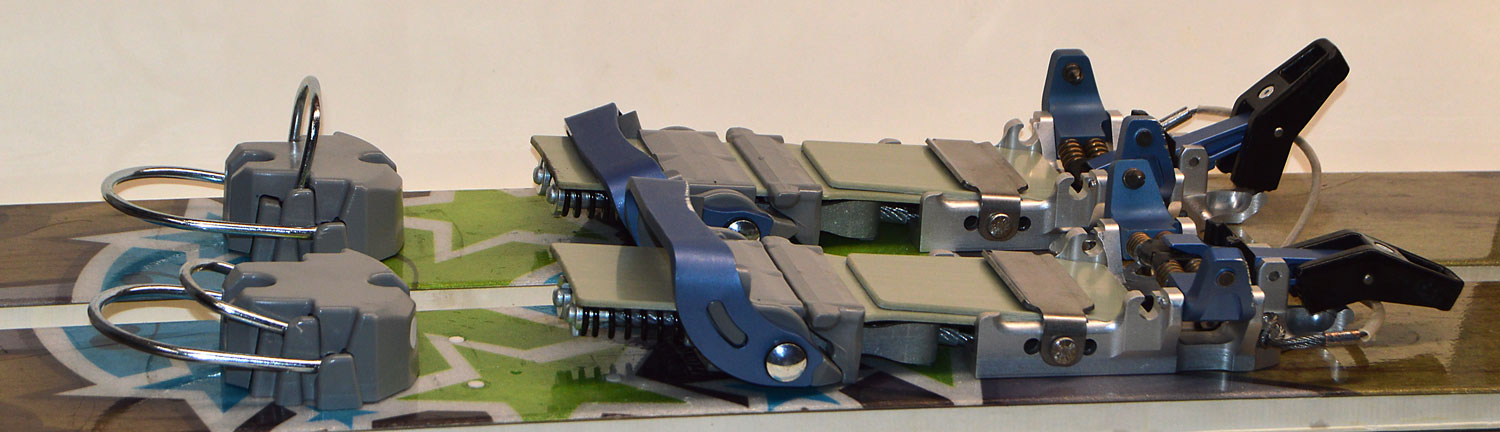
Lynx: the new 2PTN binding from 22 Designs.
We have found several issues with the Lynx that can lead to breakage or release, but can be dealt with easily.
Flex plates
22D: “We have seen one Flex Plate (sz. Large) break when skied in position 1. We now recommend skiing only in positions 2 or 3, the further back positions.”
22D recommends positions #2 or #3, especially for knee-to-ski’ers with size large Lynx.
D: I remember wondering if these flex plates were strong enough or had a limited lifetime. In the beta phase there were no issues, but apparently there may be limits. The difference between positions 1 and 2 is indistinguishable so if this cures the potential for breakage then 22D’s advise should be followed and position 3 seems a prudent choice. Metal compression springs may set to a shorter relaxed position, but the slack can be taken up. When a leaf spring brakes your binding be broke. Perhaps a spare flex plate should be in the repair kit?
Cable Housing
22D: “For skiers who ski very low, it’s possible for the clear Cable housing to become worn and/or bunched up, which can cause the Lynx to prerelease. Please watch for this. Check the housing by removing the Flex and Main Plates, and visually inspect the top of the clear Cable housing through the spring. If you see damage to the housing, contact 22 Designs for a replacement Cable. The Cable housing can also be stripped off completely, and the binding can be used with the bare cable until a replacement is received. To do this, remove the Cable Spacers, Top Hats and Springs, and strip the housing using a sharp knife.”
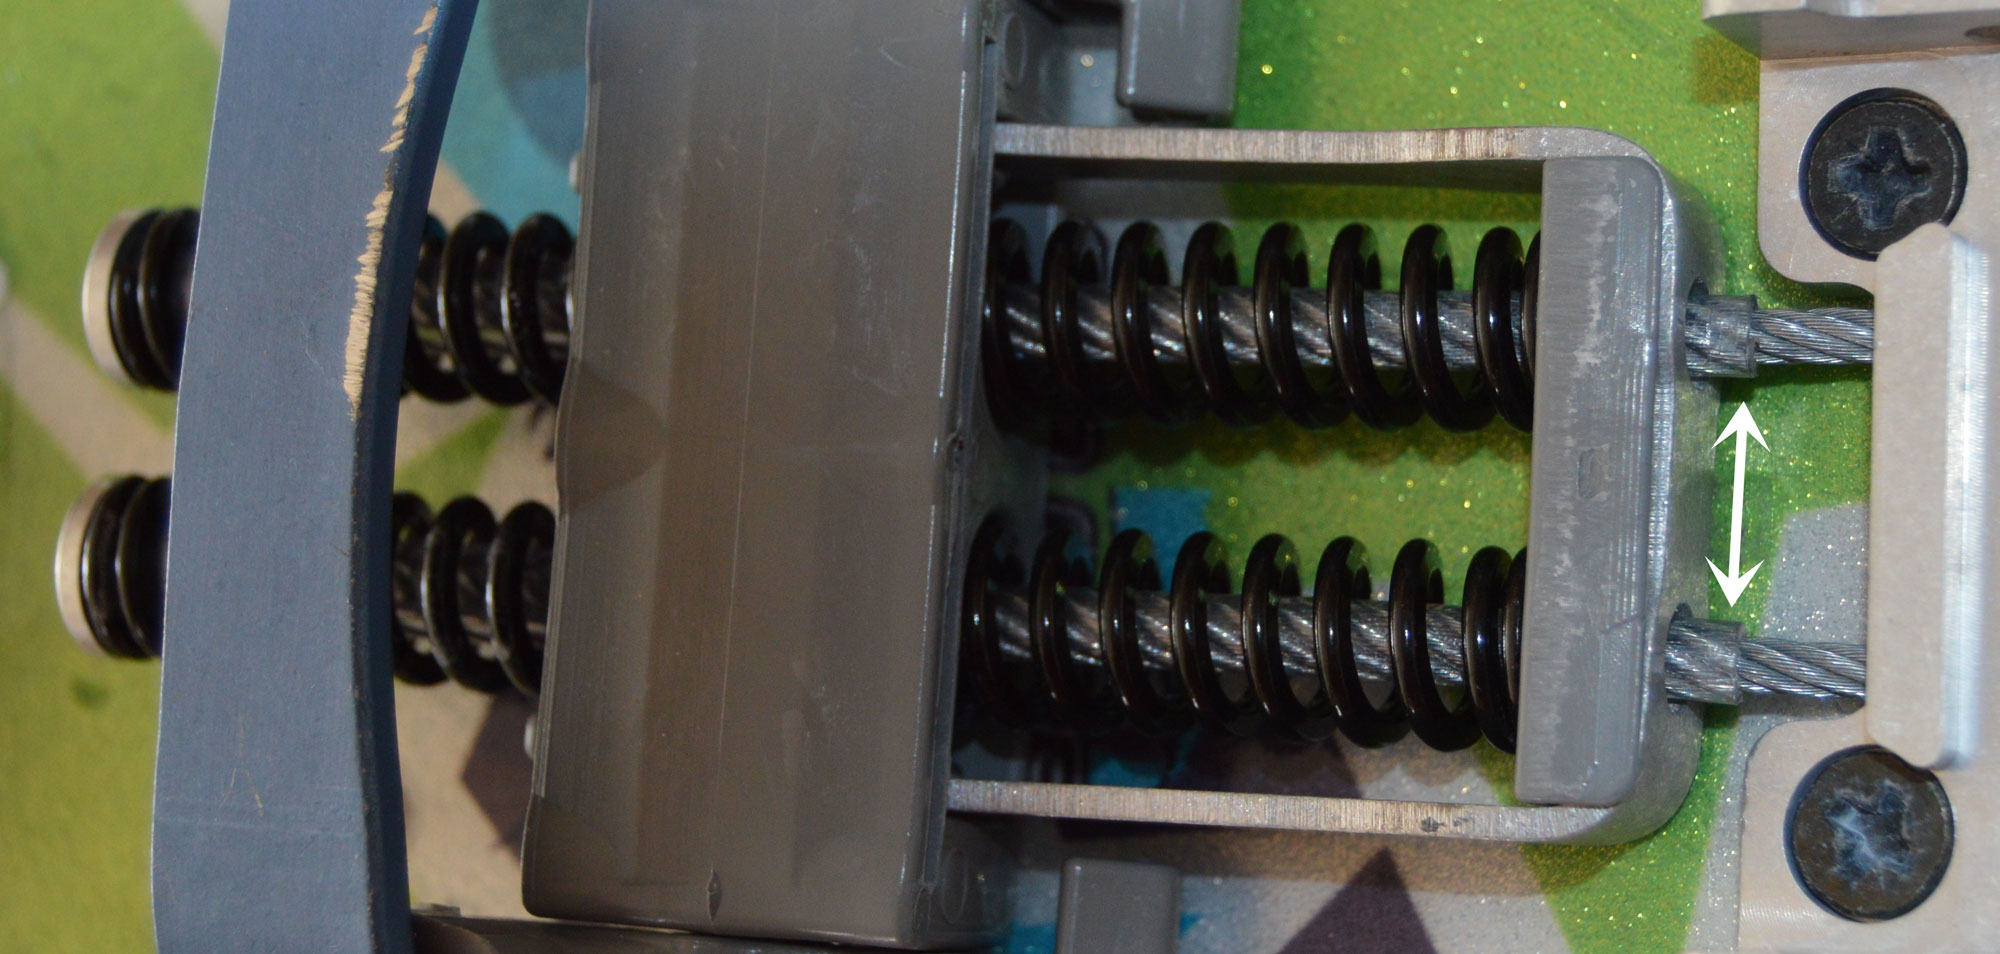
That clear plastic sheath over the braided cable, inside the springs? Yeah, those guys. If it bunchs up, cut it out and request a new cable.
D: The above suggests that future spring cables might be coated.
Spacers – spring tension compensation
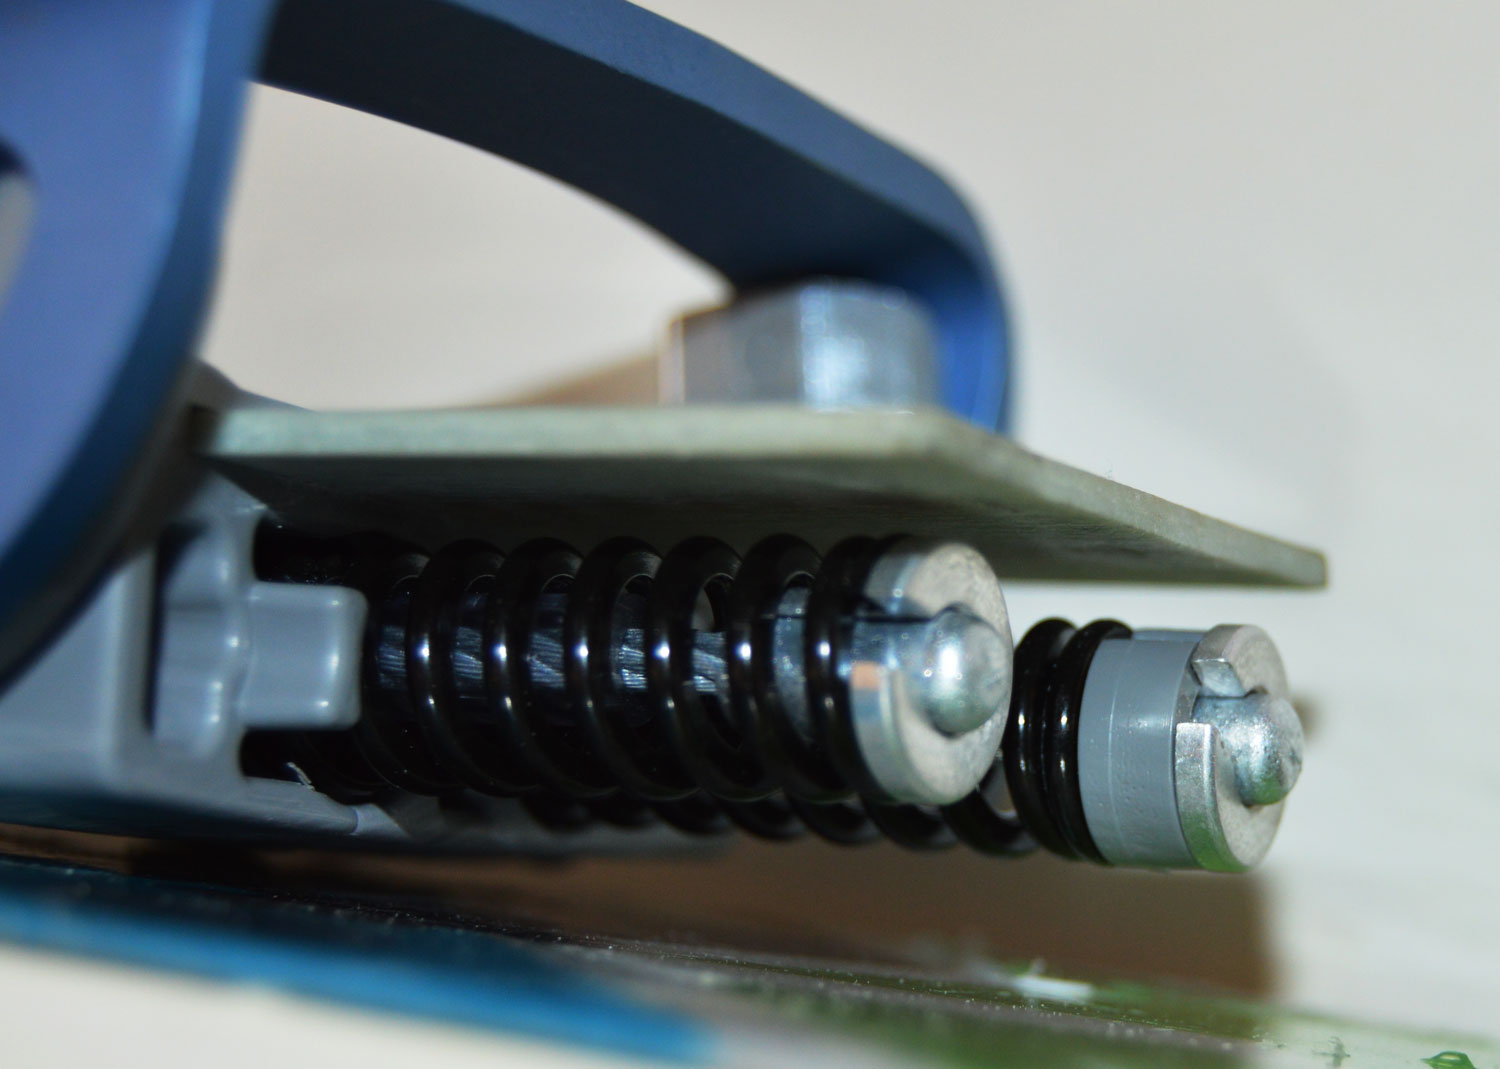
Beware, springs may shrink over time. Spare spacers advised.
22D: “We’ve seen a few Large bindings where the Cable length was slightly too long, preventing the Claw from engaging the boot’s second heel. If this is the case, you may need to install one or two of the Power Spacers. It’s also possible that low skiers may experience a Spring set, causing a need to add a Spacer to keep the Claw snappy.”
D: Not unexpected. New springs in the production version have probably reduced the amount of adjustment that must be made over time, but not completely eliminated it. Expect to buy a spare pair of spacers for the future.
Toe Lever Lock Springs
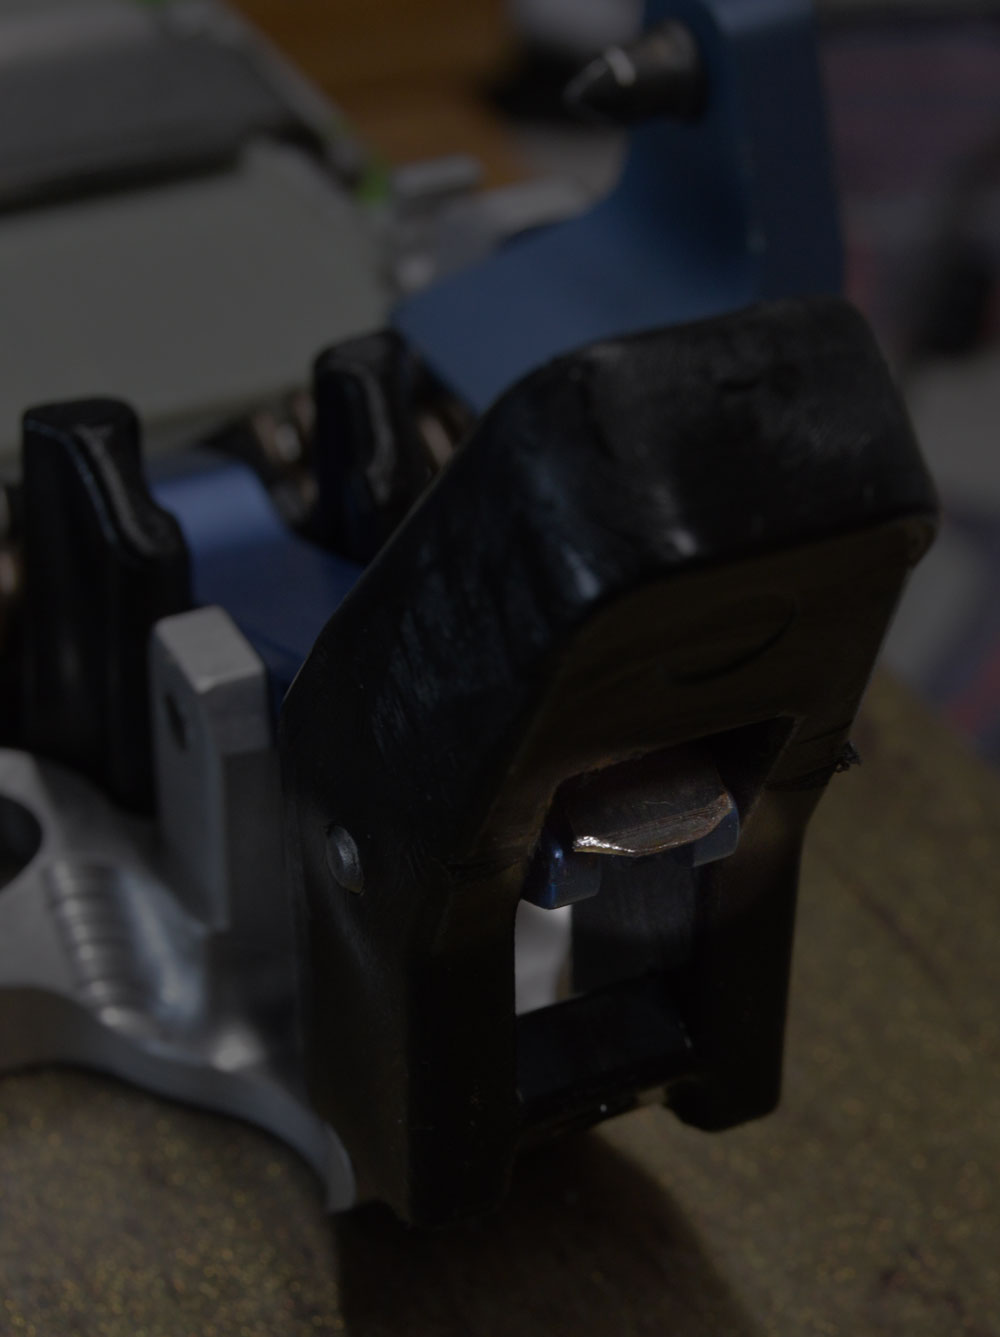
Rounded edges and corners on the Toe Lever lock spring.
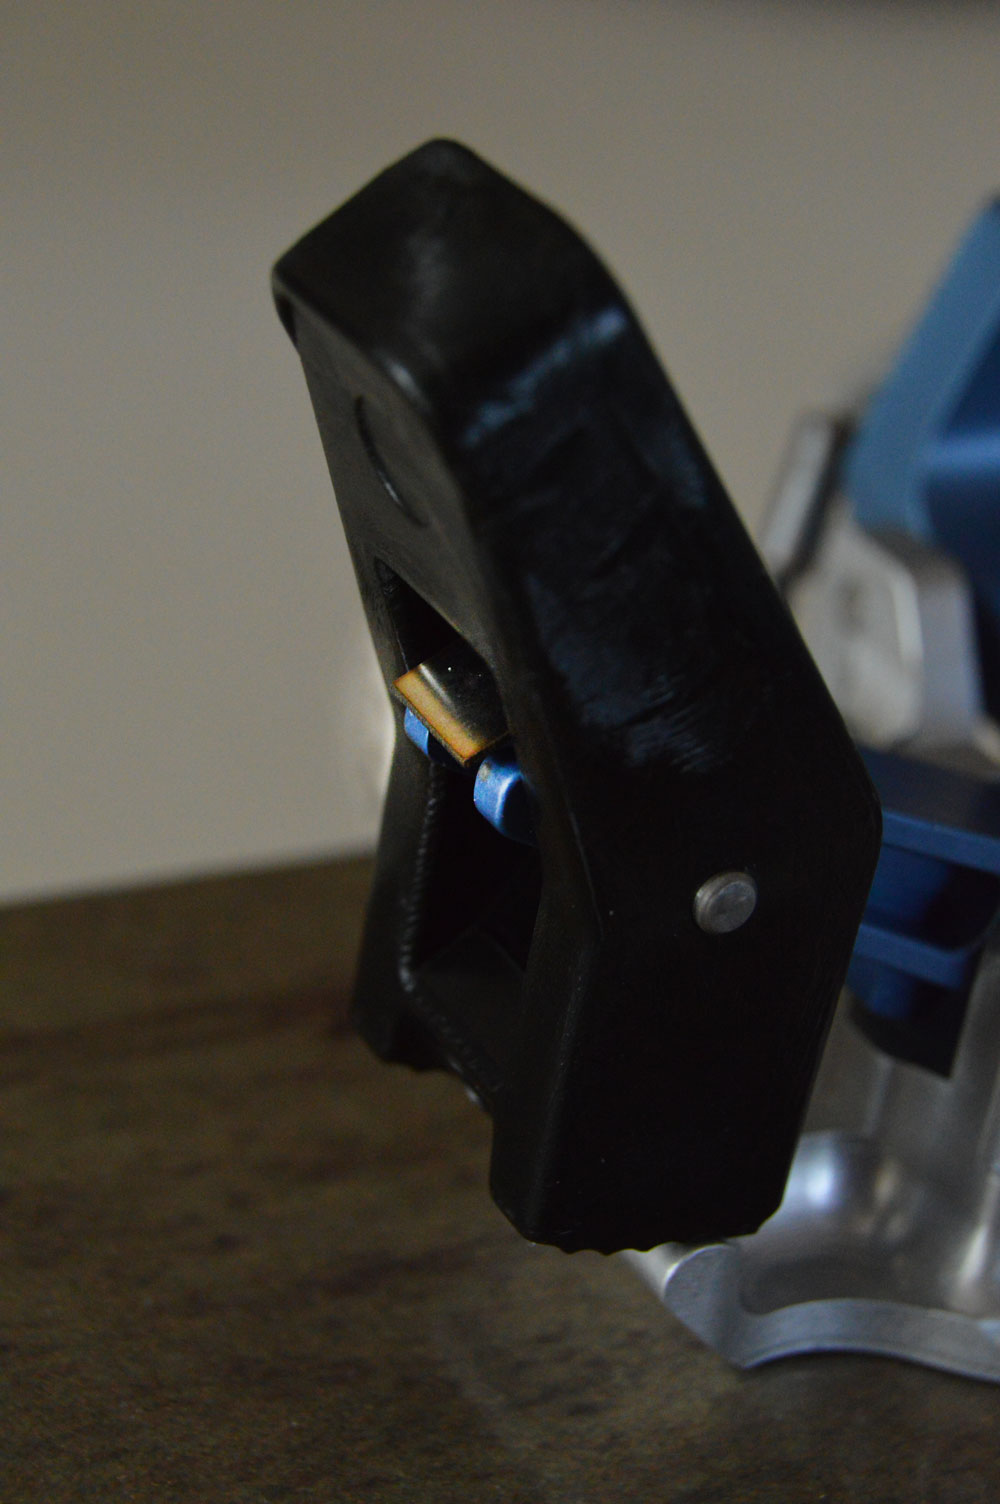
Sharp edges on the Toe Lever lock spring
22D: “The first batch of Lynx had lock springs extending too far down from the black lock at the front. They’re sharp, and can cut your glove or finger. We recommend using a file or dremel to trim the sharp corners of these.”
D: Nice catch. At first I didn’t even know what this was about until I looked at the underbelly of the toe lock lever.
Boot Inserts
22D: “It’s very important to clean out your boot’s tech inserts by following this snow removal process: Lock the Claw into tour mode, step into the toe, then lock the Tech Arms and slide your ski back and forth 4-5 times to clean out any snow. If you have trouble getting the lock to the first click, or barely to the second, you still have snow in the inserts. Keep rotating your boot until you can engage the lock to the 3rd or 4th click. Then raise the claw into ski mode and unlock the front to ski down.”
D: This is standard operating procedure for low-tech toe units. The inserts MUST be clean for the binding to work properly.
New Boots
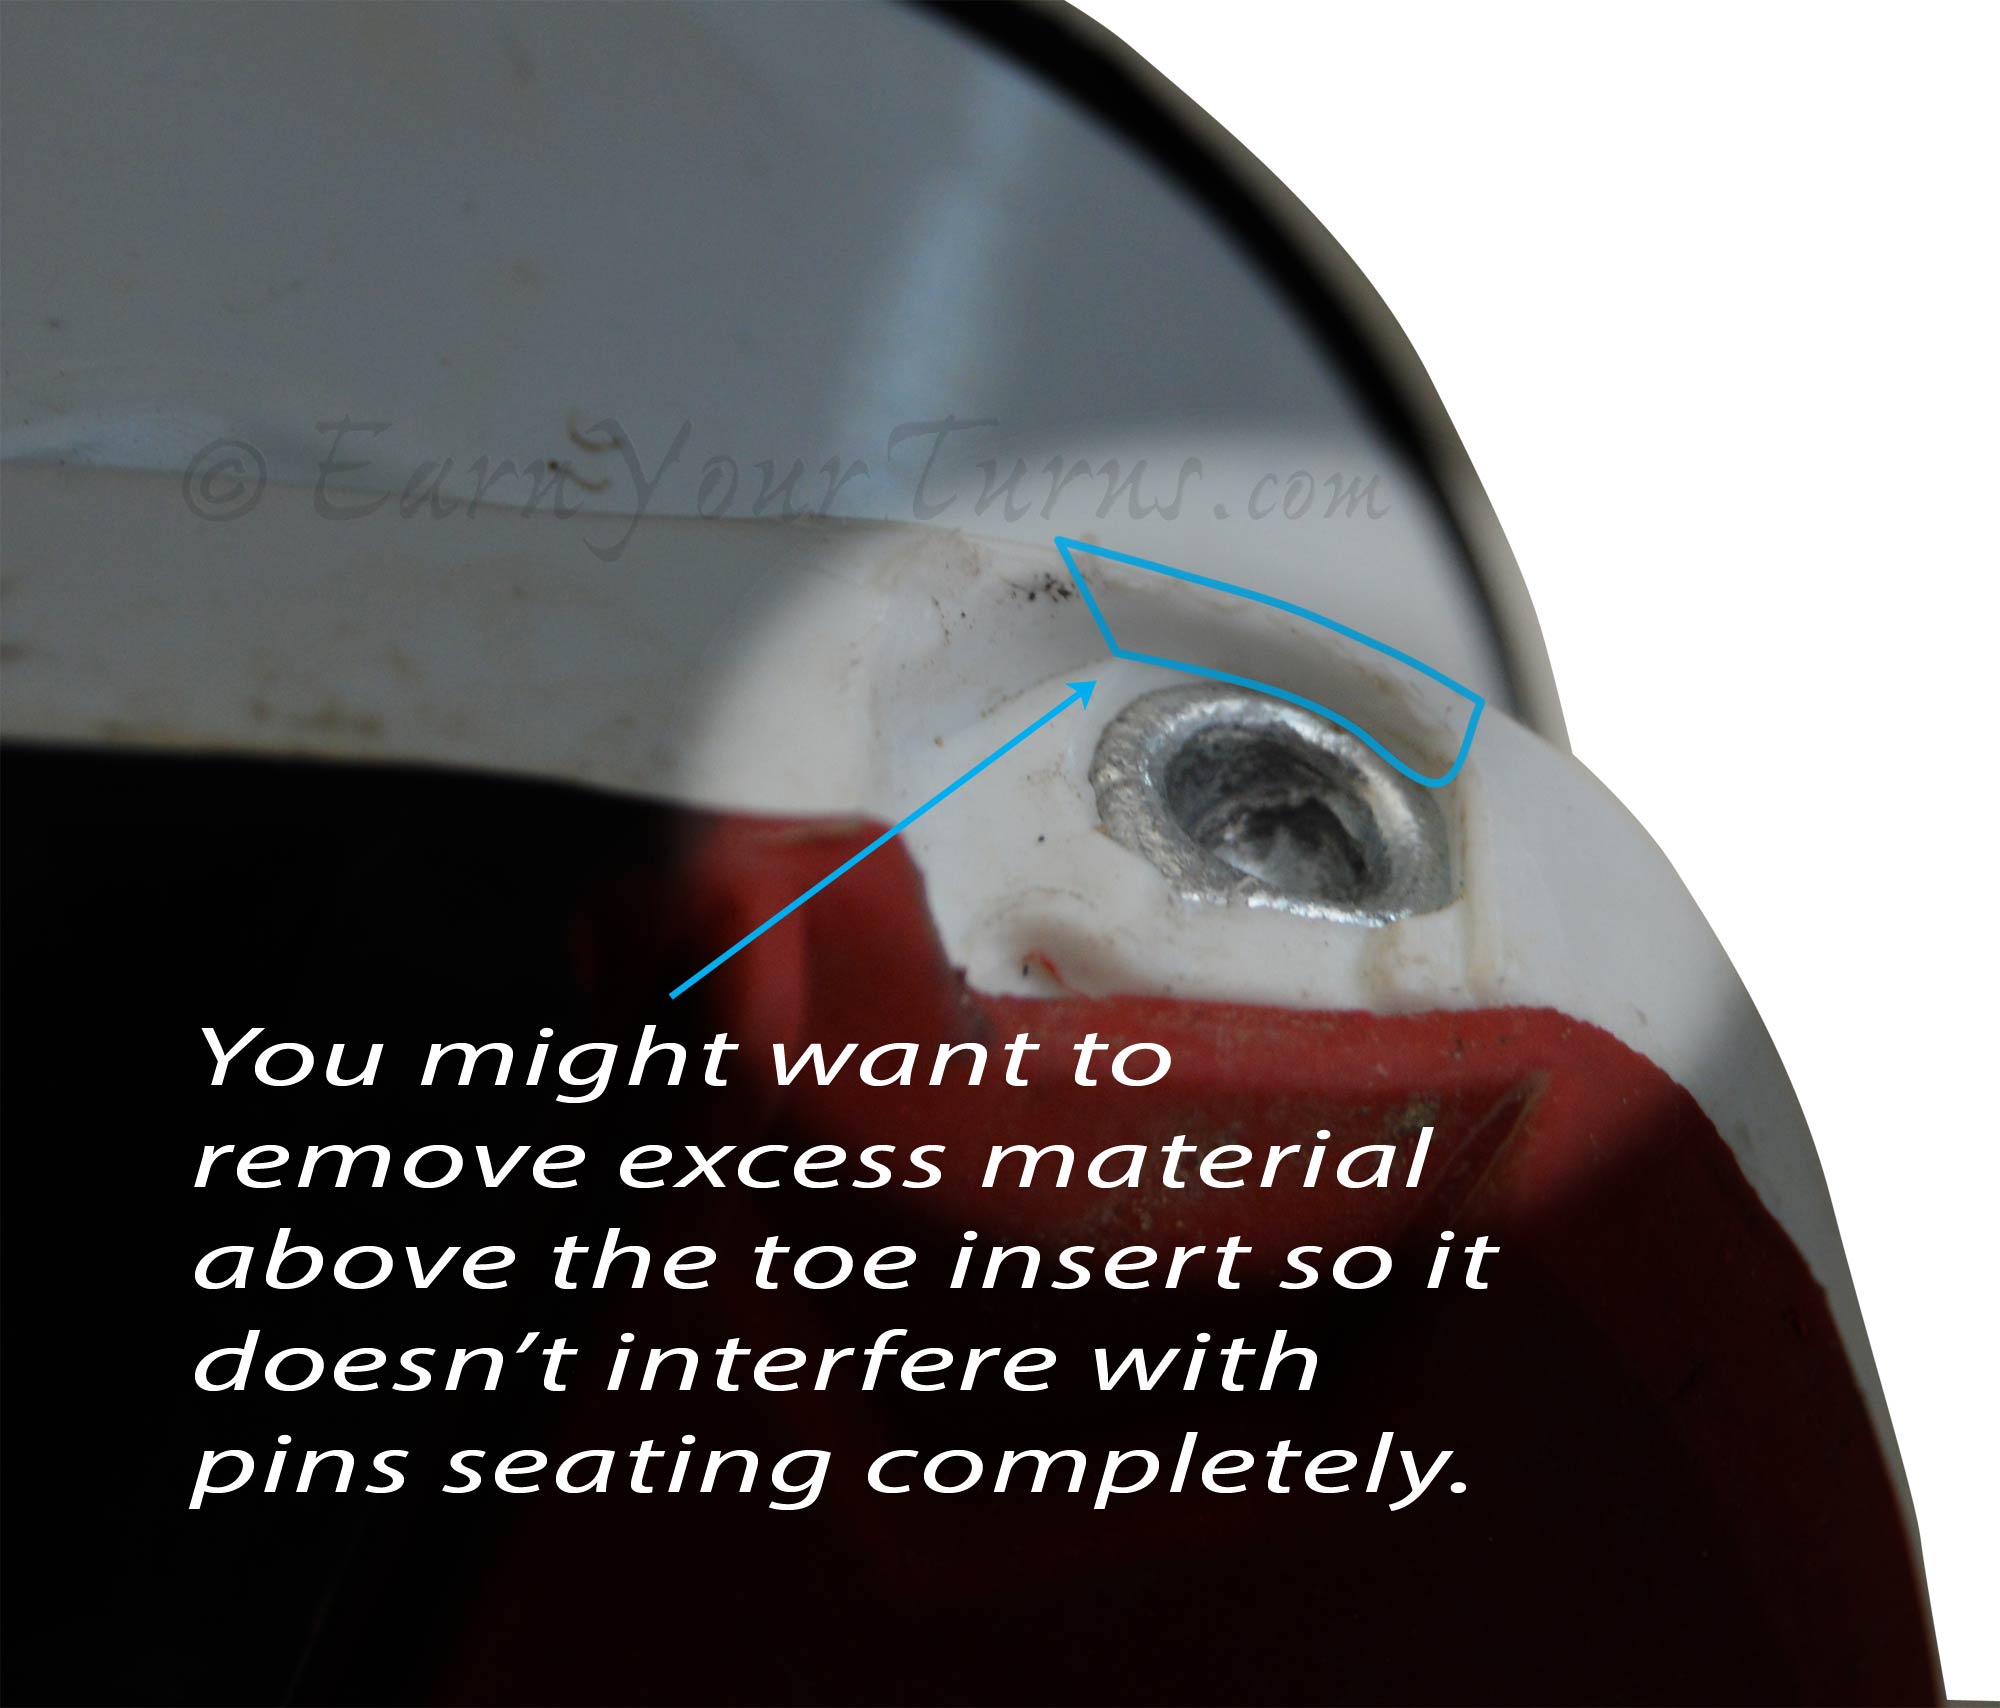
Be sure to trim excess plastic around the “face” of tech insertsâALL brands.
22D: “With newer boots, especially Scotts, you may need to trim away some plastic from above and behind the tech inserts that will not allow the tech arms to close properly.”
D: This was an issue with Crispi back when I first noticed that some of their inserts were a bit wider than genuine Dynafit inserts, causing the toe to release prematurely. At the same time I noticed that excess plastic around the insert often made contact with the pin arms. When telemarking the upward movement of the toe would then cause this excess plastic around the insert to spread the arms, again, causing pre-release. It can be an issue with Scarpa too. So trim the plastic around the insert so it is flush with its outer face.
Climbing Wires
It appears the tall climbing wire has less spring tension to hold it upright than the shorter climbing wire. I don’t know if this will cause it to collapse if/when you’re stomping to get your skins to hold, but it feels less stable than the lower position wire. Under steady pressure I’m sure it stays put just fine.
Flaw in the Claw
While the beta Lynx had trouble reliably latching onto the second heel of an NTN boot, once latched it never let go. However, with the production Lynx it appears it is possible for the Lynx to get jammed with snow which will cause the claw to let go. Here’s what happens.
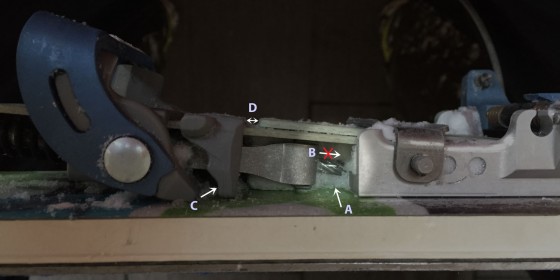
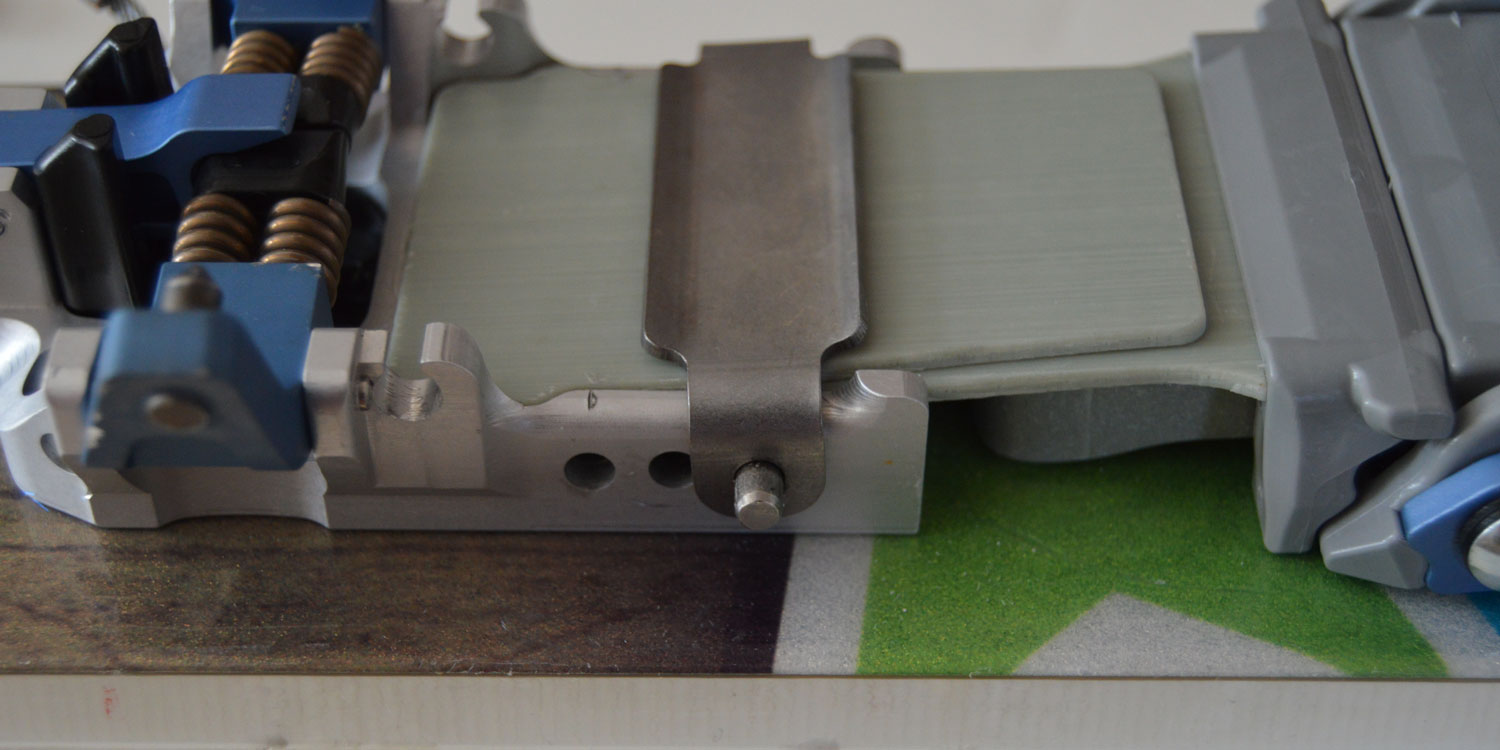
Though rare, it is possible for the Lynx to get jammed up with snow. This causes the claw to disconnect from the 2nd heel while turning.
In the picture above
- A: When snow gets packed (depends on the conditions) between the spring bracket and the back of the toe base…
- B: …the spring bracket can’t move forward. The springs pushing on the bracket pull the claw forward onto the 2nd Heel. When snow fills that space it can’t move â it is effectively pushed back. With no spring tension on the claw it falls off. Ta Da! You’re in tour mode.
- C: If the bracket could move forward, the tip of the claw cam would fit in the lower dimple it is pointing to, and…
- D: There would be no gap here as the claw assembly would move forward.
There have also been reports of the claw spontaneously grabbing the boot when in tour mode. Again, there appears to be an issue with icing conditions but no photos have surfaced explaining this phenomenon.
Conclusion
For those who missed out on the v1 version of Lynx you can be assured there’s a v1.x looming in the future. And if you’re rockin’ a pair, love to hear what you’re noticing below.
Backcountry Talk: Field Notes on Lynx v1
© 2019
2 pings