
22 Designs Outlaw is the first binding licensed by Rottefella to used their patented second heel connection. By adapting the Axl platform to a new connection point they built a winner, a binding with a tour mode that is proven to work reliably and switch modes easily in a steel based package known for durability with NTN’s laterally tight connection. In simple terms, the Outlaw is an NTN Axl.
Outlaw: American ingenuity in NTN form. Solid, step-in, tele-satisfaction — and efficient to boot.
It has all the downhill power and control of a Hammerhead binding plus some, but in a configuration that is compatible with NTN boots. This means it parallels like no 75mm binding can thanks to the inherent edging power of NTN. Like any fully capable tele binding it has a free-pivot for touring and the easiest to engage climbing wire, the spring-loaded Hammerheel. As for convenience, it’s about the easiest binding to get in to, tele or alpine.
Tour Mode
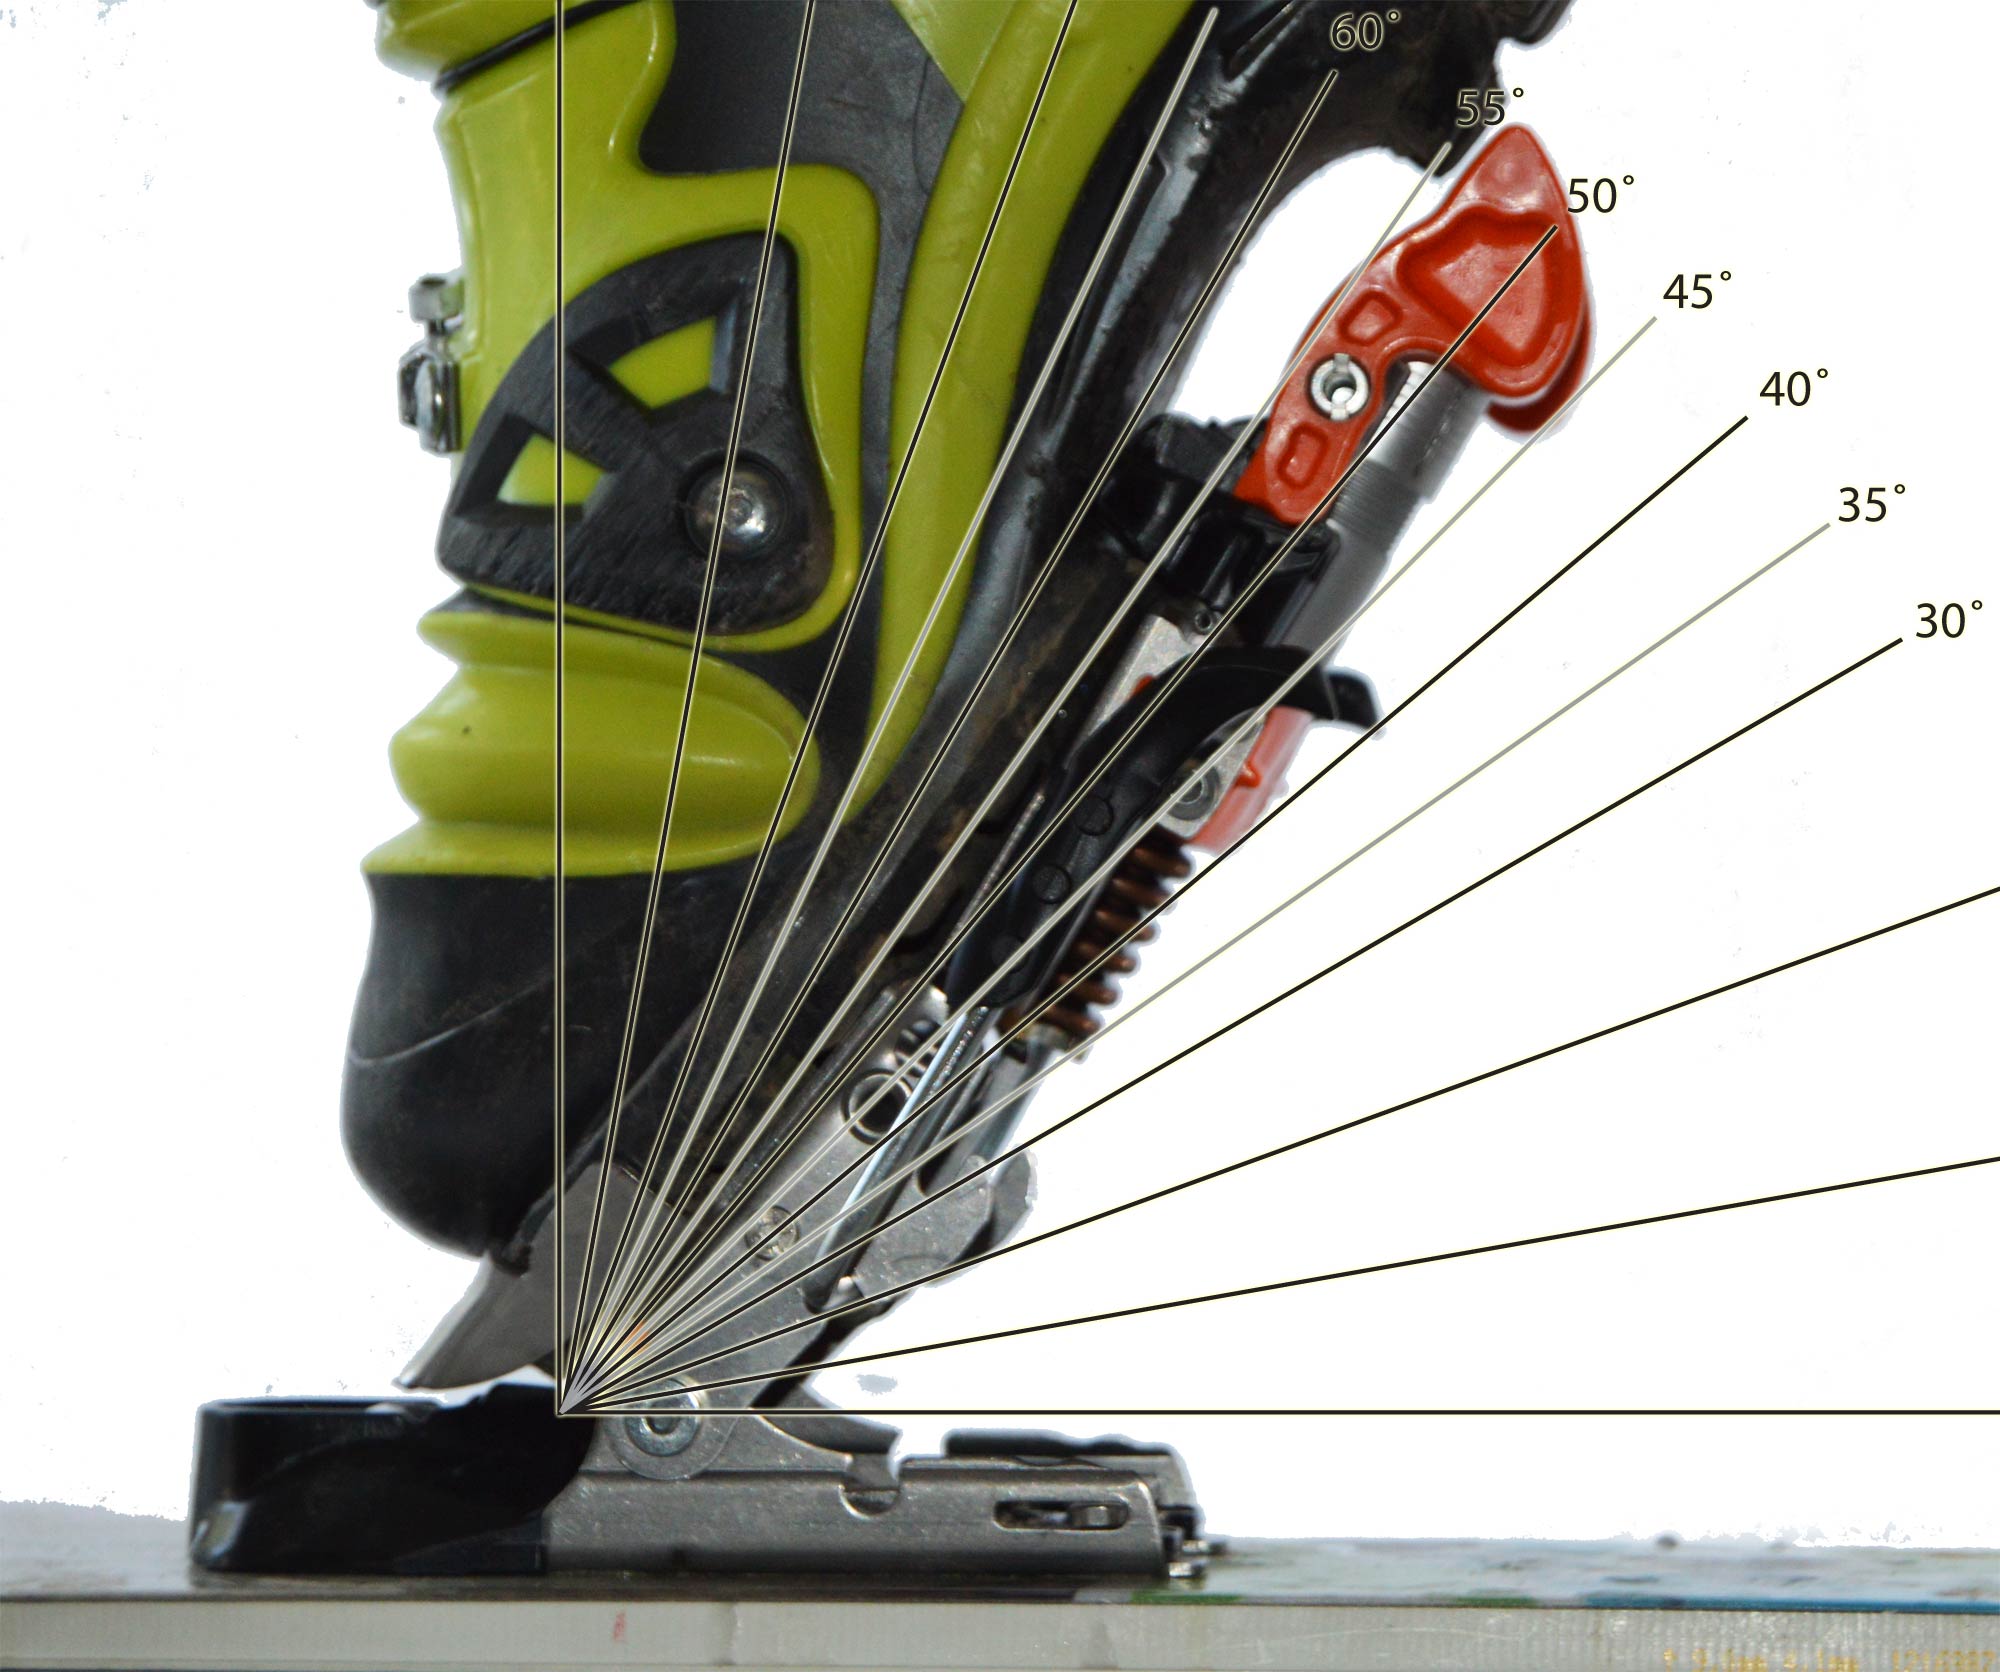
Outlaw delivers a large touring range of motion.
The free-pivot is the main reason you might want to switch to the Outlaw if you’re already riding NTN boots and aren’t able or willing to go the tech route. The Outlaw provides a truly free-pivot, yielding a solid 55+ degree range of frictionless motion. This is a full 10 degrees more than Axl. While not record setting, it is enough you can do a snap kick turn without any trouble in all but super steep terrain, by which time you’re booting anyway. The precise location of the touring pivot is a few millimeters further back compared to Axl. This yields a touring pivot that is under your big toe, not out in front. Though subtle, you might notice you have more energy available on a long day.
That’s a good part of the reason you might want to switch to the Outlaw, especially if you’re a turn earning telemarker. Freerides have noticeable touring resistance, not to mention a puny 30 degree range of motion. The Freedom is a much better touring binding than the Freeride, with 50 degree range of motion, but even the slight touring resistance of the Freedom is more than Outlaw’s none.
Downhill Chops
The reason that will really win you over though is the downhill performance because even if you’re earning turns, you’re earning for the turn, not merely the burn of the earn. Many Axl riders have resisted the switch to NTN simply because, at least until now, nothing else skied as well. Or perhaps, the difference between a 75mm/Axl rig and Freeride/Freedom NTN system didn’t justify the cost.
Ever since NTN was introduced the question has always been, is this merely an alternate configuration for telemarking, or is it the future? While I don’t have a crystal ball to confirm it, it is looking more and more like NTN is the config of the future. Even though the performance characteristics of 75mm have never been better, and it is a high level especially compared to twenty years ago, it will never get any better than it is now. It has limited out. In less than a decade NTN has unquestionably surpassed the performance of 75mm with better downhill performance, equal or better touring performance, and potentially a lot less weight.
(c’mon Scarpa, Scott, and Crispi – we can’t hold our breath much longer)
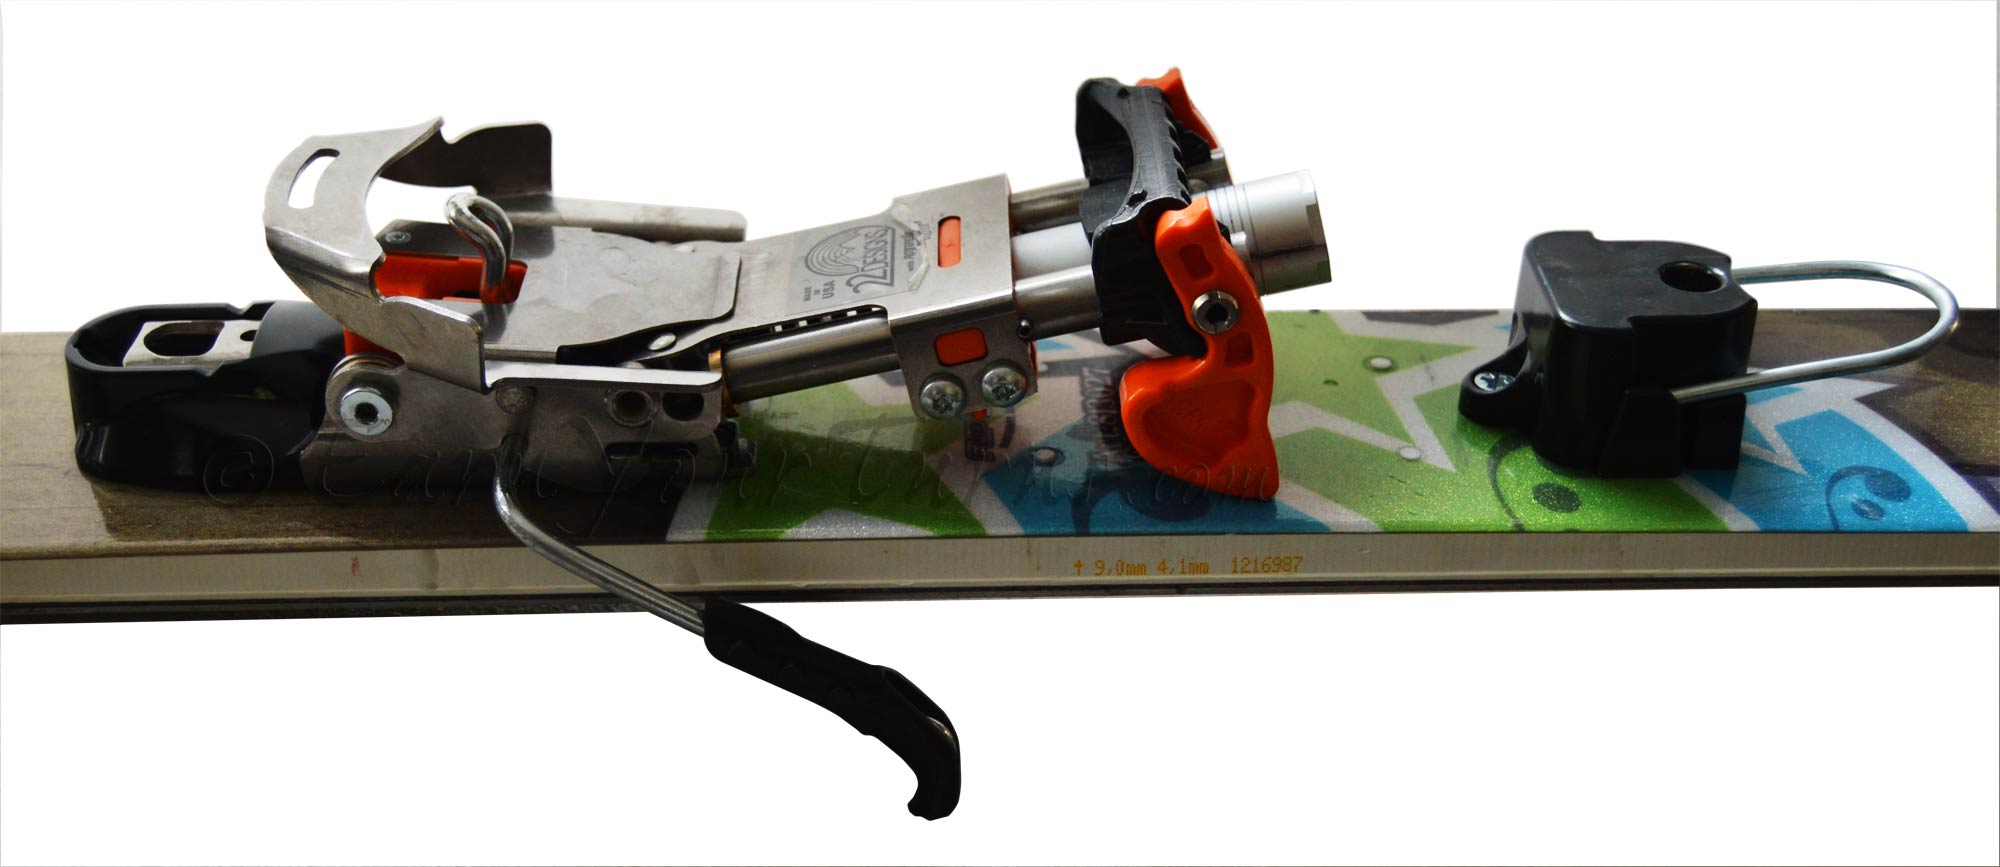
In the telemark realm of downhill performance the Outlaw is the first NTN binding that truly mimics the smooth, powerful response of the Hammerhead, arguably even better. Most 75mm bindings, even Rottefella’s Freeride, don’t really increase flex tension until the heel is lifted beyond five degrees. With the Outlaw there is no “dead spot,” it feels instantaneous. Unlike the Freeride or Freedom, the cable tension originates approximately 40 mm behind pinline so there’s no waiting for the power to kick in. One way that is evident is when your skis are dangling from a chairlift, your ski doesn’t droop.
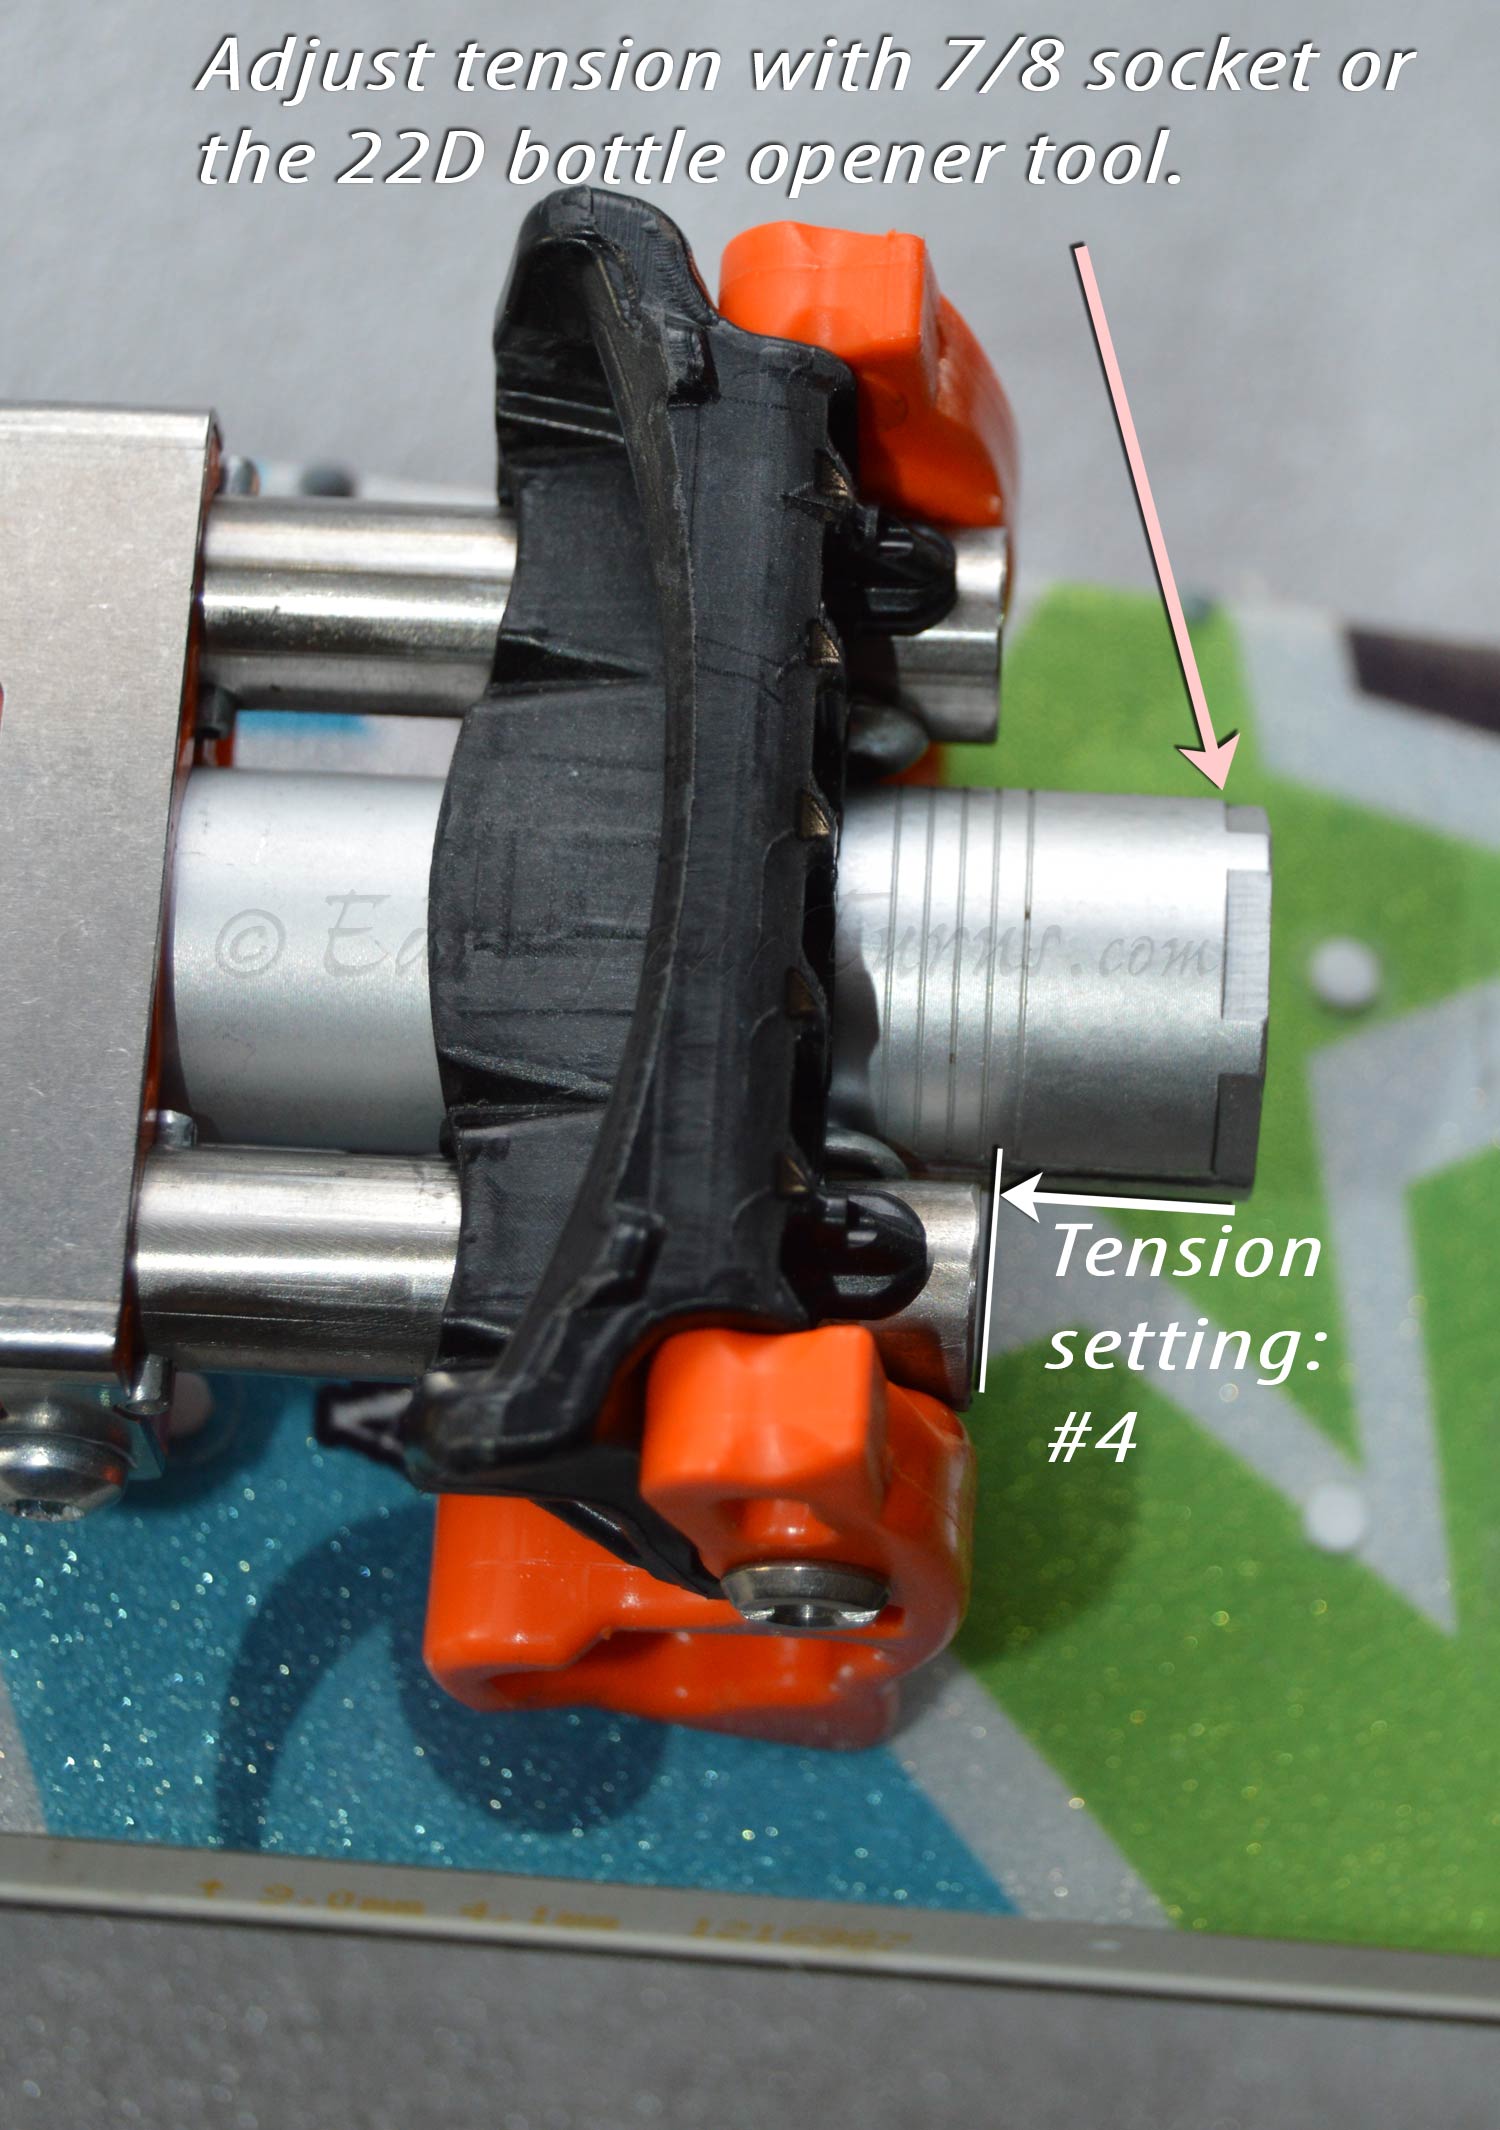
No cable pivot position adjustment, that’s fixed, but you can adjust the tension by tightening the springs.
Easy In…
There are a few other reasons worth considering the Outlaw. Without question it is the easiest binding to get into in the world, er, provided you don’t install the ski brakes. To get in, hold the ski steady beneath your foot by putting your ski pole in the mode switch. Then slide your boot in under the toe bar and step down. Voila, you’re in.
Even alpine bindings, though equally simple in terms of coordination, require more force on the heel. However, if you add the optional brake, now you need a bit of technique and practice to make getting in simple. It will never be as easy as no brake, but with practice it is almost as easy. Again, hold the ski steady by putting your ski pole in the mode switch, but this time you need to hold the ski in place with more force. To overcome the spring tension of the brake, you need to kick your toe in under the toe bar to get the brake lever to lay down, and this is where you may get frustrated. With practice and a bit of luck it you can get your toe under the toe bar first try, and then you step down, ta da, and you’re in. However, sometimes your aim while kicking may be off. I saw one Outlaw owner get frustrated when, even after a season of use, it took six tries each to get in to both bindings. He was understandably frustrated, but we all have bad days.
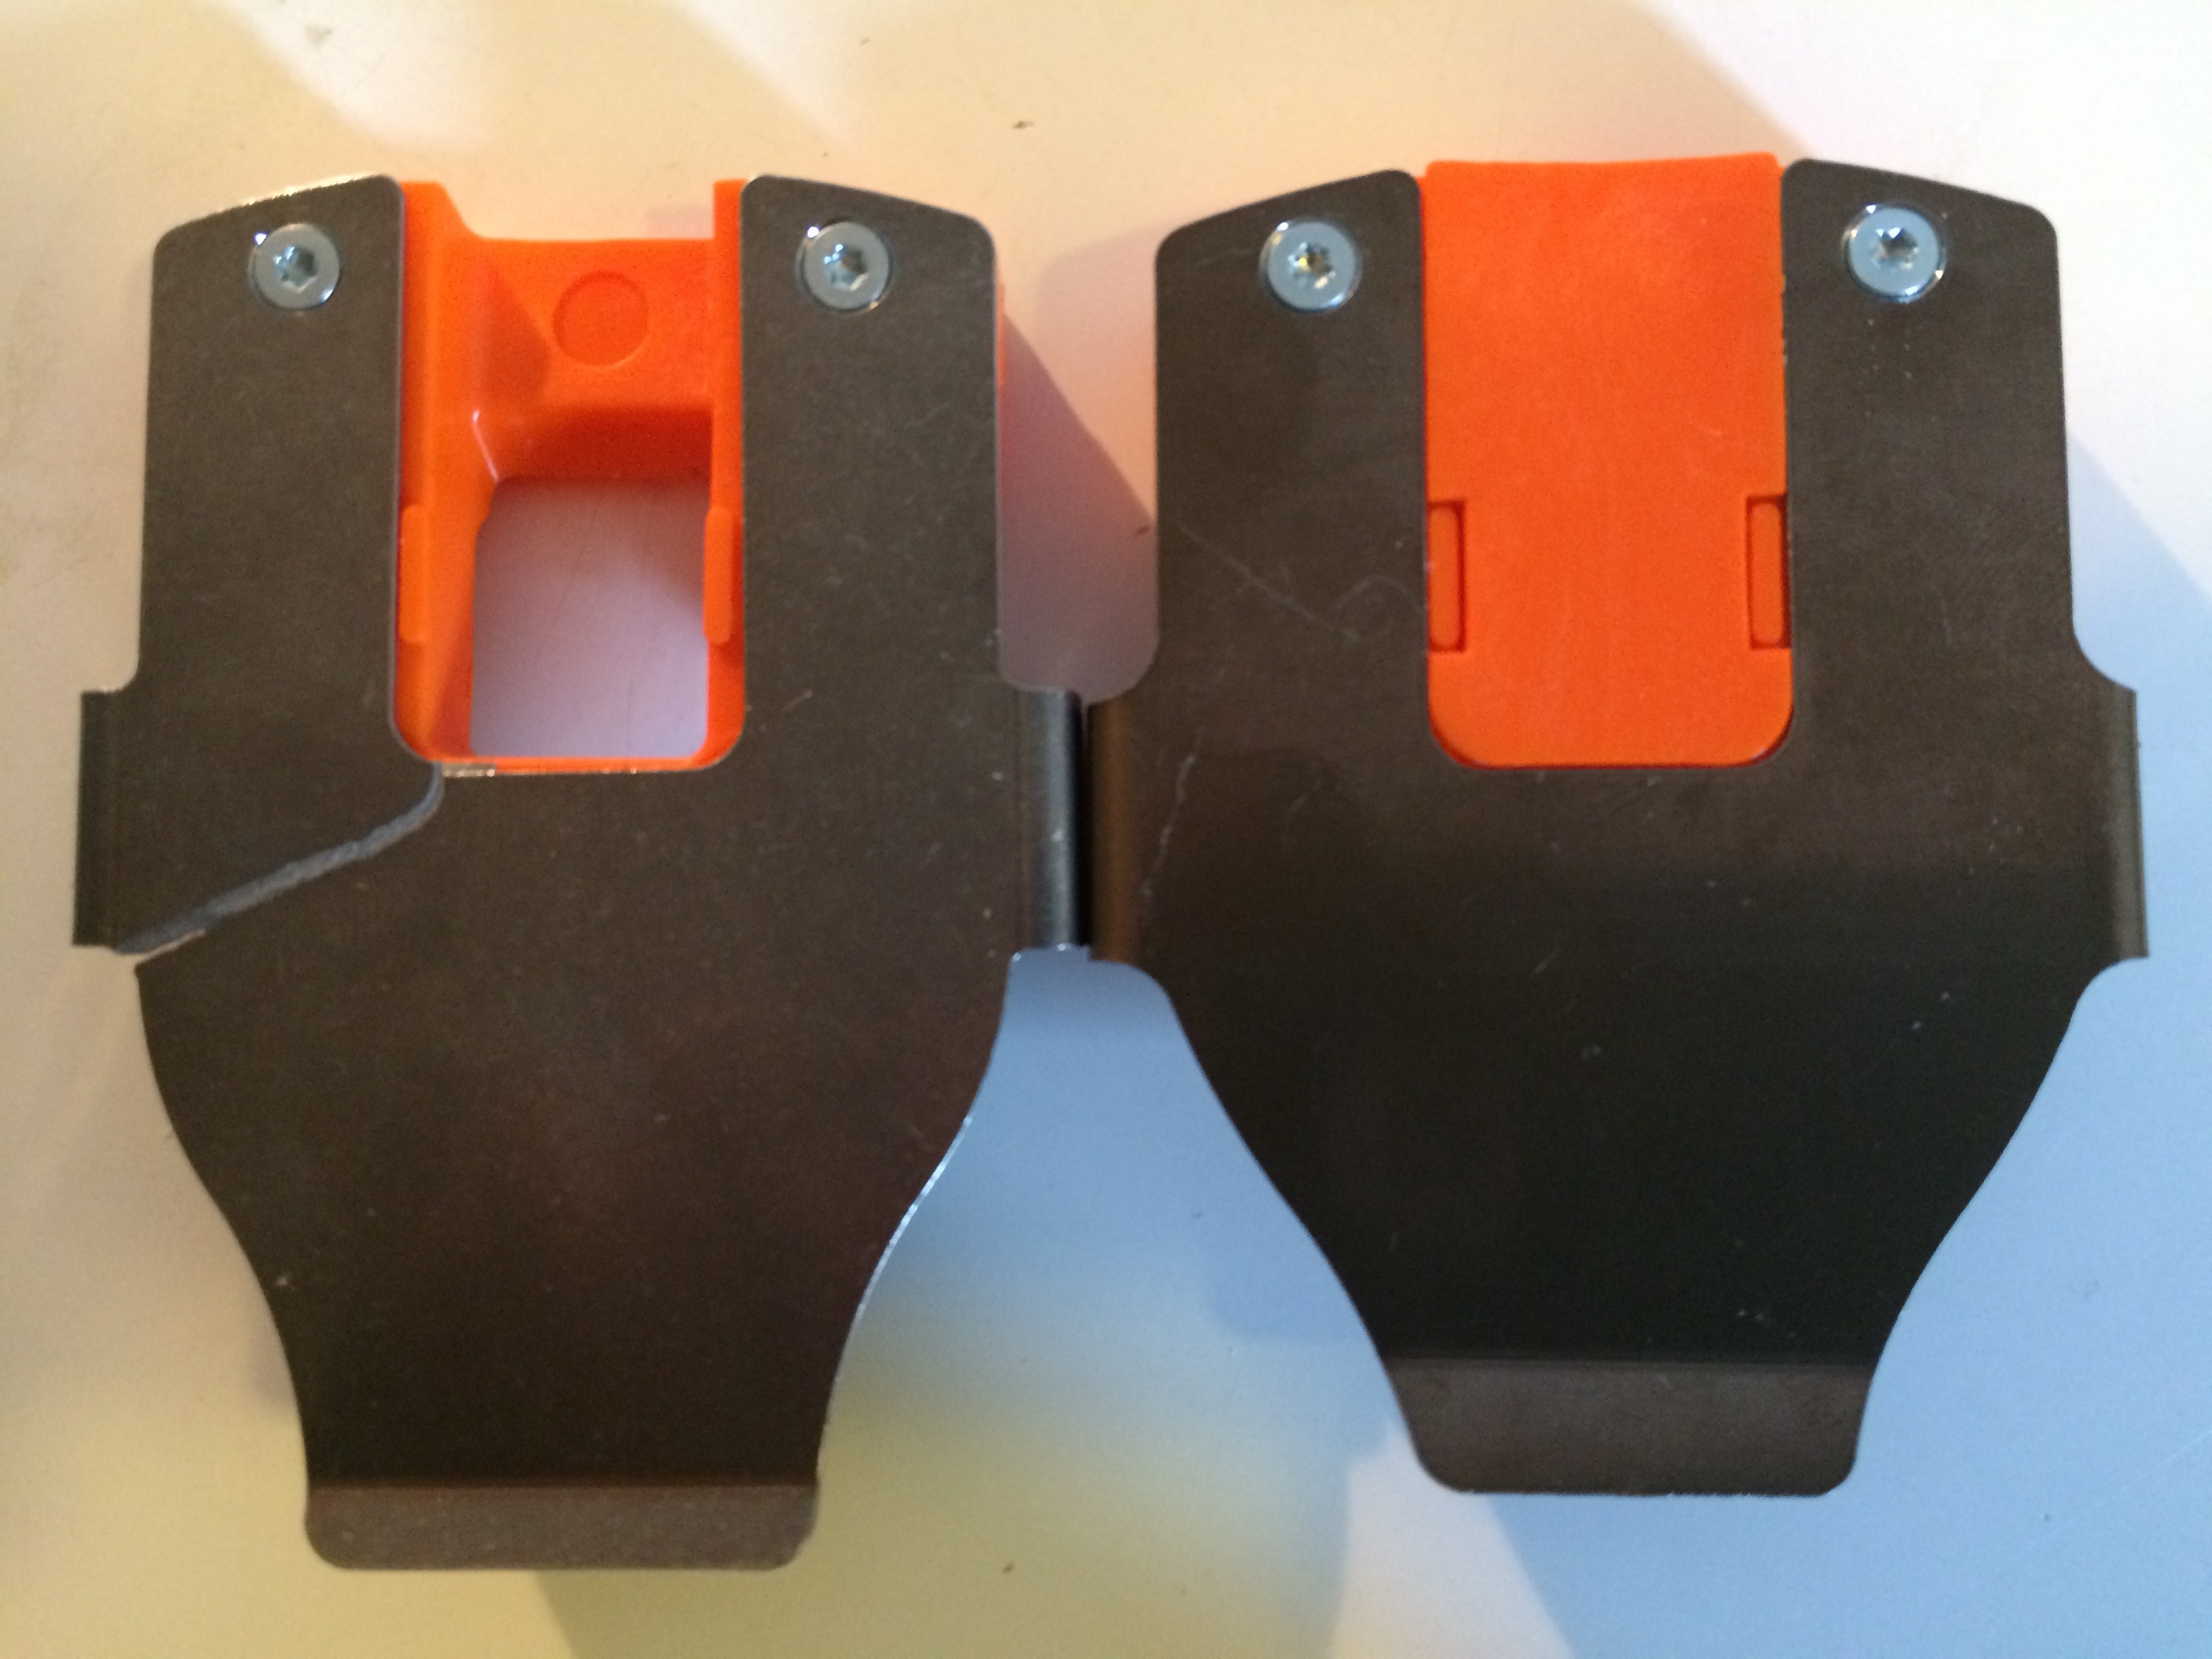
As easy as this is, some folks find the orange cam that cocks the plate up and holds the claw open doesn’t fully close on the duckbutt when you step down on it. Apparently the height of the Hammerheel prevents the boot from pushing down low enough for the cam to flatten out and let the claw hook onto the duckbutt. The solution is to provide teflon spacers under the cam so it closes easier. This suggests a modified cam part is in the future, and/or a lower Hammerheel block.
Ski Brake Quandry
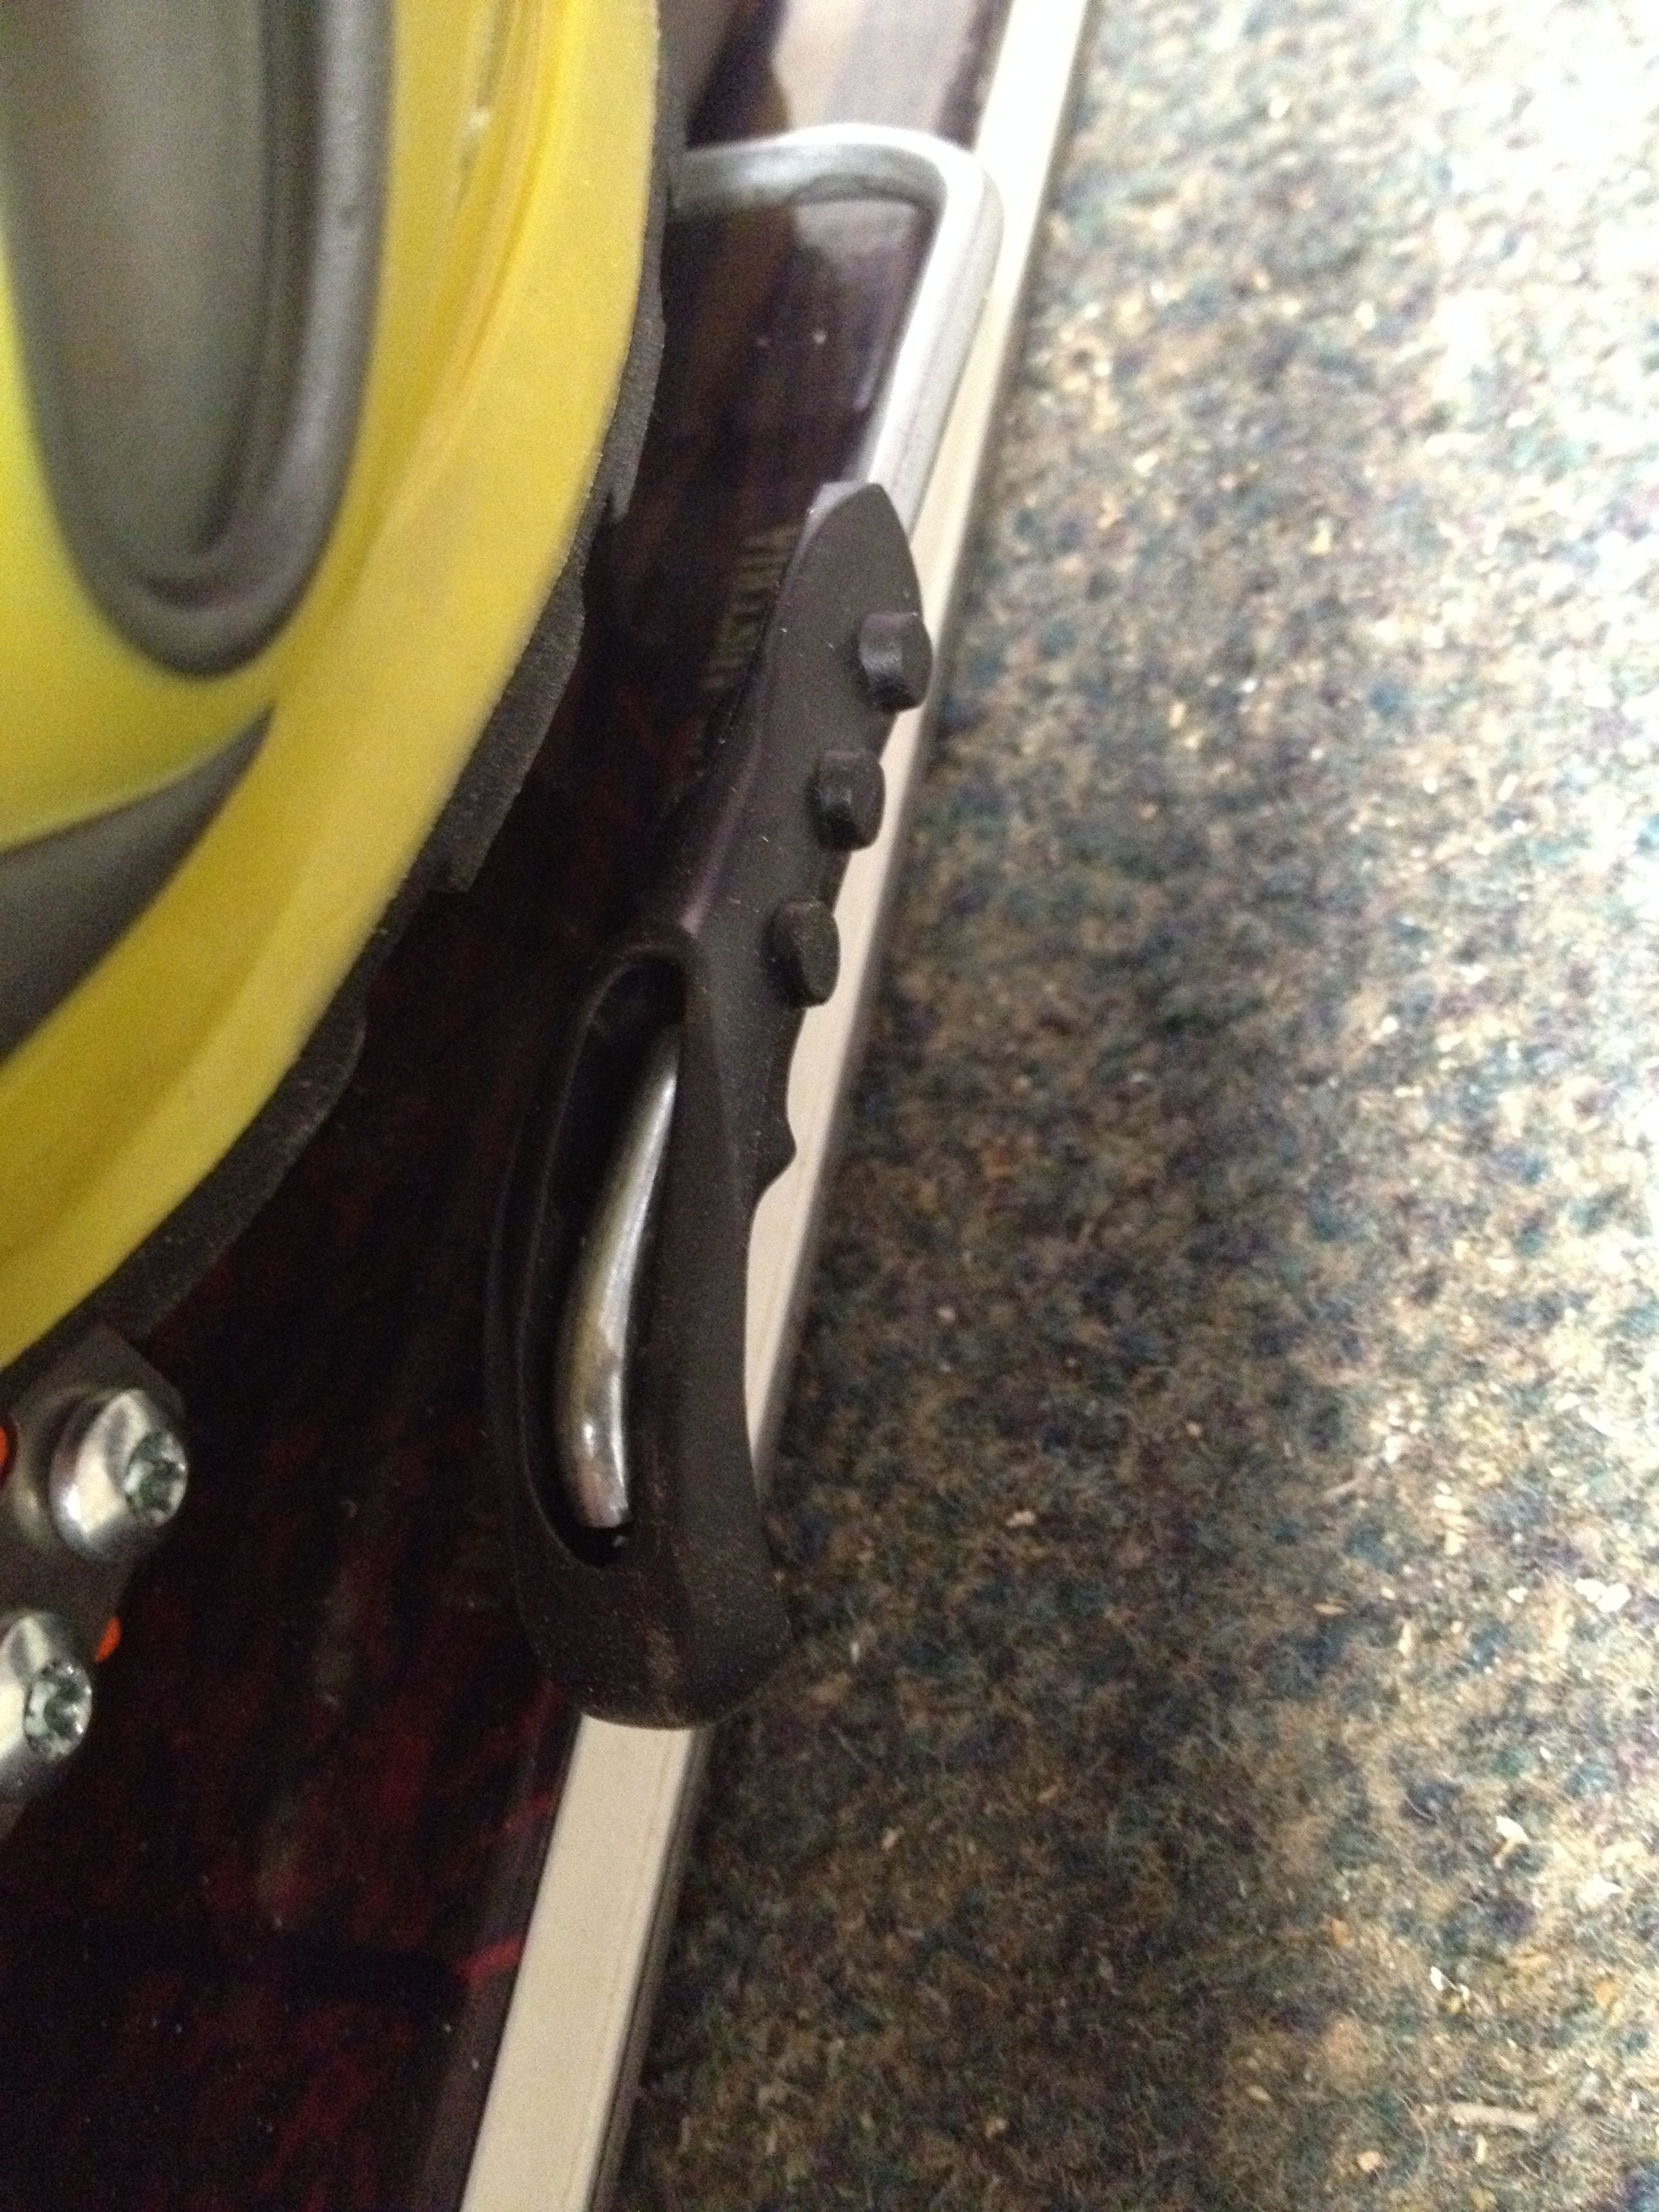
Notice how far the ski brake can hang out to the side. That’s a potential liability.
Besides making the entry to the binding more difficult, the brakes lift up, but do not retract to the inside the way some alpine brakes do. Thus, they hang out as wide as they are, and sometimes that is too wide, allowing the brake wires to be hooked by the opposing foot and bent outward, either turning or touring. If that errant bend is large enough, the brakes become a liability, not a benefit. For the record, 22 Designs doesn’t recommend brakes for the backcountry; I concur.
…Fiddling Out
Where everyone gets a bit frustrated is getting out of the binding. This definitely takes practice and I can’t say I have it dialed for myself yet, but I have nailed it a few times. The trick is to put your ski pole tip in the cam on the inside of the binding and hold it down while you lift your heel. Now, here’s the trick; as you lift your heel, twist your boot to the outside. If you lift, then twist, chances are your boot will pull back and the second heel will remain hooked by the claw and won’t clear the toe bar either. Your boot is loose, but still caught. In that case, move you ski pole to the mode switch to hold the ski in place and push the toe forward so you can wiggle free at the duckbutt. If you lift and twist, almost simultaneously, your toe will stay forward, allowing the duckbutt to slide out of the clutches of the claw. Practice is most definitely required to make this a smooth move.
Durability
First gen flex plates were prone to cracking. Notice the bend at the back is wider in the revised version.
Check your toe piece for cracks. 22D will replace it for bindings still under warranty.
The idea of using a slick pin, so that removing the brakes is simplified for going in the backcountry is a nice feature, but it needs to hold up. The biggest complaint, as mentioned above, was how much more difficult it was to get in the binding with brakes. Considering brakes are desireable but not mandatory, and their absence does nothing to inhibit making solid tele turns, or earning ’em, the Outlaw is remarkable compared to nearly any other binding at introduction. It reminds me of the Hammerhead, which did have fewer year one issues, but it also had fewer moving parts. While such introductory durability is desired, it is an oddity in the ski world. To 22D’s credit, they have been quite up front and open about all issues and their willingness to make necessary corrections.
Conclusion
Weight wise the Outlaw doesn’t set any records. The Freedom is lighter, but only by a few ounces (~50 g). The frictionless tour mode renders that extra drag weight undetectable where it matters, on a climb. When it’s time to turn those sticks, it has downright enviable tele performance — smooth, solid, satisfying. About the only reason to not add a pair to your quiver is because you’re satisfied with the duckbill program and you’ll probably die before your boots do (and you have Axls). For everyone else, squirrel away some cash to get with the program next season.
22 Designs
Outlaw
MSRP: $400
Weight/pr: Lg – 3 lbs., 11 oz. (1670 g) • Sm – 3 lbs., 8 oz. (1580 g)
Related Posts
BCTalk thread: Head for the hills the Outlaw’s are comin’
Review: 22D’s Axl
Review: Hammerhead
© 2016
10 comments
Skip to comment form
Great review.
Surprised to hear the slic pin doesn’t change the engagement point of the cable. Is there some other mechanism to do this or is it preset to a single setting (e.g., HH 5)?
Hopefully brake can be improved on entry and retractability as a dialed in brake is key to convenience. Wonder if the challenges of the binding release is a risk in an avy or tricky situation (e.g., random stuckage in heavy wet snow).
You can adjust the flex on the Outlaw by turning the cap at the end of the spring. Pre load setting 1-5 that makes a big difference in the flex of the binding but no adjustable pivot position.
Once again, Dostie pens the best review out there, very thorough and objective.
A few additional points:
The mounting hole pattern is same as the Axls/Hammerheads so switching to NTN has never been easier.
In addition to upgraded Slic pins, flex plates, and toe pieces, 22D is working on an improved cam for next season to make stepping in even easier.
The only time that I have had trouble stepping in is when a small “volcano” of ice has protruded from one of holes in the HammerHeel (the hole in the post for the mounting screw). This ice can be difficult to remove so best to prevent by filling or covering the hole. G3 has red plastic plugs on their heel pieces but they are too small for re-using on the HammerHeels. I cover the hole with Teflon tape that used to be standard with the Hammerhead’s Hammerheels (but aren’t included anymore I think). It would be good if 22D made a plug or cover to cover the heel post hole.
Random parting shot – there is another popular backcountry ski blog out there that refuses to cover telemark gear and has predicted the end of any telemark gear innovation for years now (with the latent assumption that tele died and was buried a decade ago), BUT will write multiple blog posts jumping up and down with praise when Dynafit makes a slight tweak to a 30 year old binding to address an age old performance or durability issue. In the past two years, two truly revolutionary bindings (Meidjo and Outlaw) are released to crickets most everywhere but here.
Skiing the Outlaw last year reminded me of the sensation I got when I first skied tele (on Riva Is), and again when I first skied the Hammerhead. No amount of tweaking of a fixed heel binding will feel as revolutionary to the skier as these incredible new tele bindings.
I ski Axl on Scottybob Headrush & really love them. Tried a NTN Freeride on Scot Missions for a few days, solid but not so much fun. Really did not notice any difference in edge control.
I still am not sure NTN is the final stage of development. The duckbutt is behind the bellows, same as trad 75mm, IMHO it is the ball of the foot that has to be held down as long as possible.
So don’t think I will jump on the NTN bandwagon just yet. (Pin bindings, perhaps)
Another way of changing the flex is to simply remove one of the two springs. You retain the adjustability with the end cap (1-5) but lower the preload setting over all. Personally I find it a pity that the pivot location is not adjustable. This way the binding will be very different depending on your boot size.
Anybody else have an Outlaw pull out of a ski? I don’t know if the ski delaminated causing the screws to pull out or if the NTN was too stressful for the Cham 97HM. I was skiing through some thick, heavy, wet, chop late last Spring when the binding came out, luckily on a ski area. Probably had 150-200 hours on them. Just want to know if anyone else has had issues as I’m very hesitant to mount them on another pair of ski’s – at least any ski without metal in them. Any issues with the Axl’s? I still have my duckbill boots and now I’m trying to decide if I should stick with the Outlaws or go to the Axl. Thanks! Dan https://uploads.disquscdn.com/images/b61a122f8525d907b74bd97036d07a2b6fd3da8cdf51dc69f72b10774856da94.jpg https://uploads.disquscdn.com/images/55c945e228d32ad97330ae960e05eca1407e2d98650c59d986a1eca8bd733c8b.jpg https://uploads.disquscdn.com/images/57ab6993ceefd819d6bf5c322bd542822049abe5b4c827980c6f8ad298ecce58.png
Figured while I was here I’d throw in my experiences with the Outlaw. Disclaimer: I tried the Rottefella Freedom prior to buying the Outlaws and bought the Outlaws primarily based on 22Designs reputation with the Hammerheads and Axl; although I had never skied either of them. The last new bindings I bought were G3 Targa’s and Targa Ascents 10 years ago. Yes, I took some time off to buy a house, have kids, etc. Anyway…
– Very solid, very active. You can’t make lazy tele turns, they need to be skied hard.
– If you are tired or feeling lazy, they’re great at ripping Alpine turns especially on corduroy,
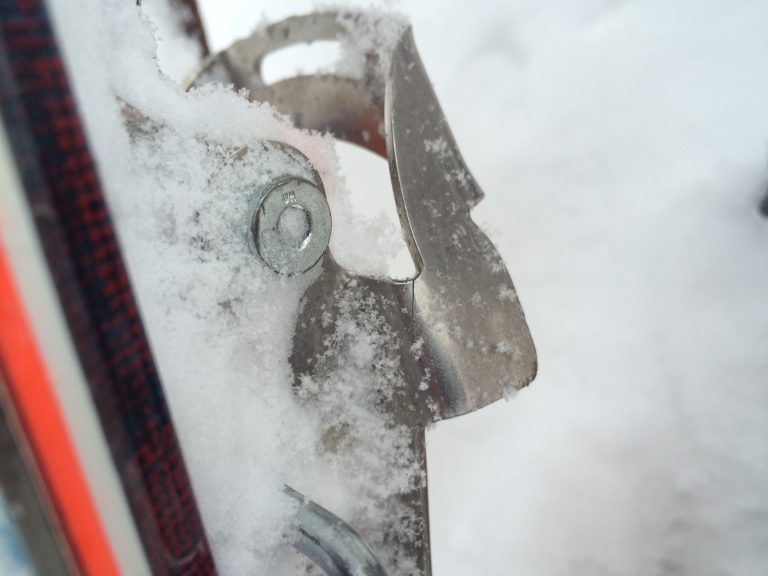
– I found the cams were too high off the ski, see photos, to “step in”. I experimented with a few different scrapers to find the right thickness to fill the gap between the ski and cam. Once I found the right thickness I cut a piece of plexiglass of the proper thickness to size and fastened it to the ski with 3M Automotive Emblem double face tape (available at Napa, etc.). This worked great at making the cams functional, the shims never came off, and I had no icing issues.
– The brakes are a great convenience for all the usual reasons (ski’s not running away when you lay them on the snow or the wind blows them out of the rack, not having to use a strap to secure your ski’s together, not having to bend over, ski not slapping you if it ever did release, BC safety) but it took hours before I got used to a wider stance so as not to catch them on each other. Even then, I would catch them on each other on occasion. It never ended in disaster – but could have. If/when I remount the Outlaws I won’t be using the brakes unless they redesign them so they tuck up and out of the way Alpine style.
– As others have noted, getting in with the brakes can be a pain in the butt. With practice I found putting my pole in the mode switch to hold the ski in place and then kicking my toe in at an angle followed by stepping down hard (with cam shims in place) got me in 99% of the time – on a flat stable area. Putting them on in deep powder, on a steep side slope, etc. is another story.
– I don’t find getting out difficult. I put the tip of my ski pole in the cam, lift my heel, and with a sharp flick of my wrist I snap the cam open. The trick is to lower your foot down far enough without the cam closing again, with your boot all the way forward in the binding and then wiggle your foot out.
– Impossible to get out of without poles. When I ski with my young kids without poles I borrow a pole out of the ski racks to release the cam. Food for thought if you have an incident where you lose your poles and need to release your bindings.
– They’re great for skinning uphill but need a second higher heel lift. Why would you make a binding with a 50* range of motion and put that short little heel lift on it? On another note, I have G3 Via Carbon poles and the tab on the handle makes flipping the heel lift up a piece of cake, I love these poles!
– Aside from them pulling out of my ski (see previous post) I have not had any cracks or other breakage.
Cheers,
oldmantele
https://uploads.disquscdn.com/images/fec492e33ca35e4145cd94940b95ea5d845cf661dc5343014758b3c0b6c65c58.jpg https://uploads.disquscdn.com/images/84fc9e3d94984b16fe054ebeae1d5208b758762d36a49f76b839494ada3183ef.jpg https://uploads.disquscdn.com/images/11c5f68aa2ee448119cc008f6f46b4fea14ee81942b6b4993b5c64c839950c02.jpg
Just back from a ten day trip in which I was in and out of them all day, everyday.
Working backwards from stepping out of them–I don’t understand why people make such a big deal out of this. To me, this is the easiest part of the binding. I can get them to reliably and easily release by pressing down on the cam with a gloved finger. With a pole, it’s easier still and it doesn’t matter if you try the inside or outside slots. I agree with others who advise to use the pole to hold the binding in position while you lift your heel.
They ski really well. WAY better than Freedoms (YMMV). They skin better than any binding I’ve used (admittedly not that many: BD 02s, G3 Targas, Freedoms).
They are really heavy.
The brakes are difficult to get used to but not impossible. I’ve worn a divot in the center toe of both my boots learning. I can now (after a good 4 days of multiple exits and entries) step in without using my poles. It is really finicky.
I haven’t used them in the steep backcountry, but can easily understand why people would prefer leashes. I went with the brakes as I am currently a quiver of one and was traveling to an area with lots of gondolas. I didn’t want the hassle of leashes. Not sure I made the right call.
The Outlaw X is the current model – said to be more durable, a bit lighter and easier to get into and out of.