
Measure twice, cut once
—Carpenter’s Rule
Mounting bindings is a pretty simple operation if you’re dealing with a popular binding that your local shop has a jig for. Save yourself time and hassle and pay them to do it. The only exception is if you know they don’t sweat the details. In that case, you need to make sure your bindings are mounted right; find another shop or do it yourself.
Binding Location
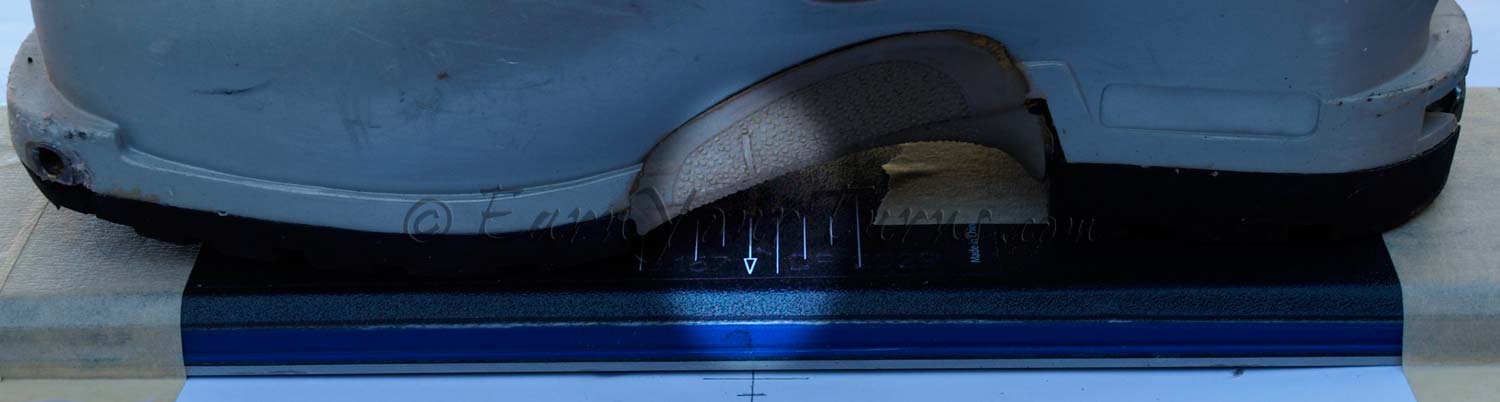
Line up ski boot center with the corresponding mark on the ski.
Once you know where to mount, if at all possible, borrow a jig for mounting your binding. If no jig is available, remember that without a mounting jig, the carpenter’s rule rules.
As an example, this tutorial will deal with mounting a pair of TTS bindings. At this stage in the development of the TTS binding all that exists is a paper jig. Errors can occur with printing due to resizing and uncontrollable shifts in the positions pixels of ink show up in. Therefore, it behooves the prudent mounter to doubt the accuracy of any paper jig.
Tools
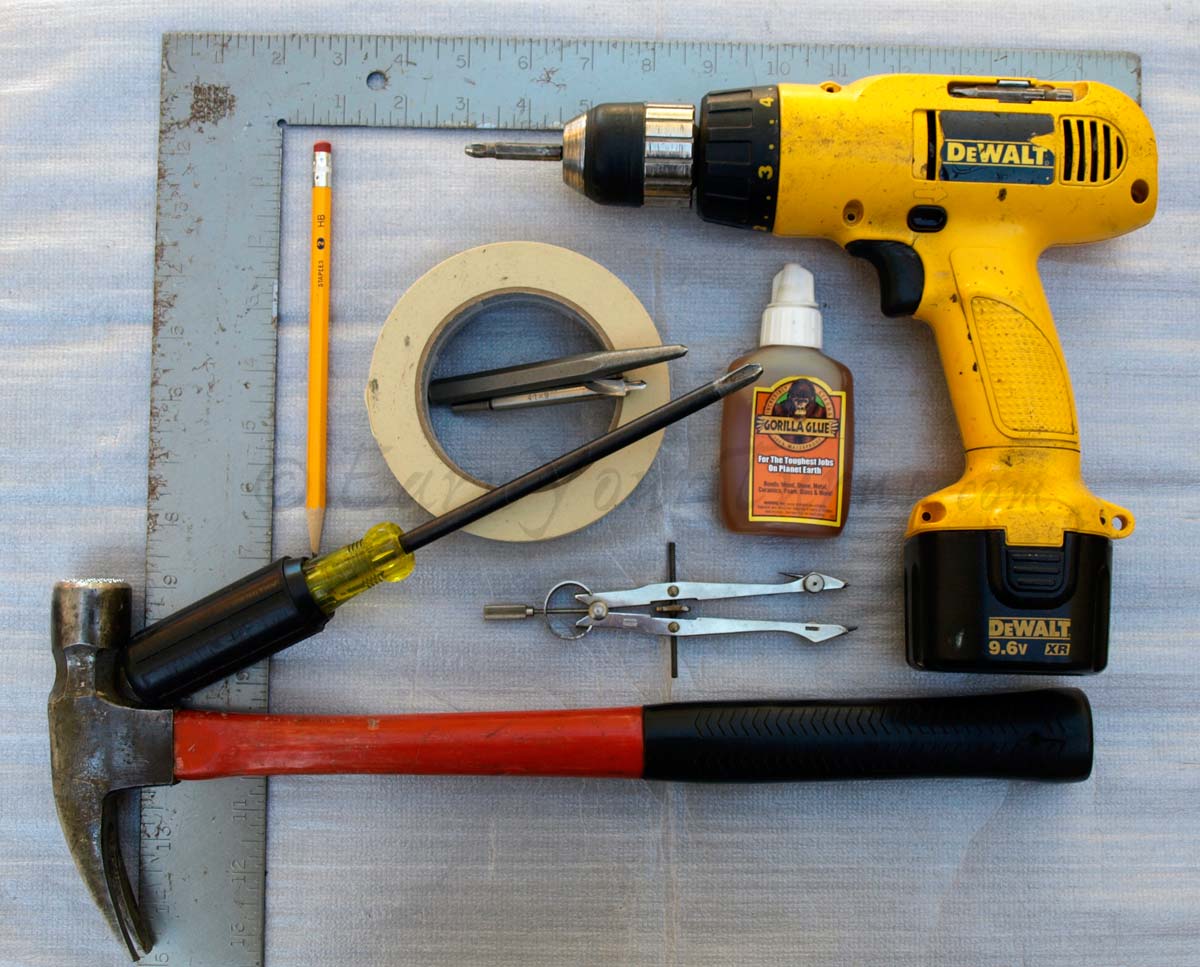
All the tools you need, minus a jig. With a jig, you only need the drill, bits, and glue.
- Drill
- Stepped drill-bit
3.5 x 9 mm, 4.1 x 9 mm - Glue
Wood, Gorilla, Slow-cure Epoxy - #3 Posi-drive Screwdriver/drill bit
- Center Punch
Sharpened 16d nail works - Compass
- Pencil
- Masking Tape
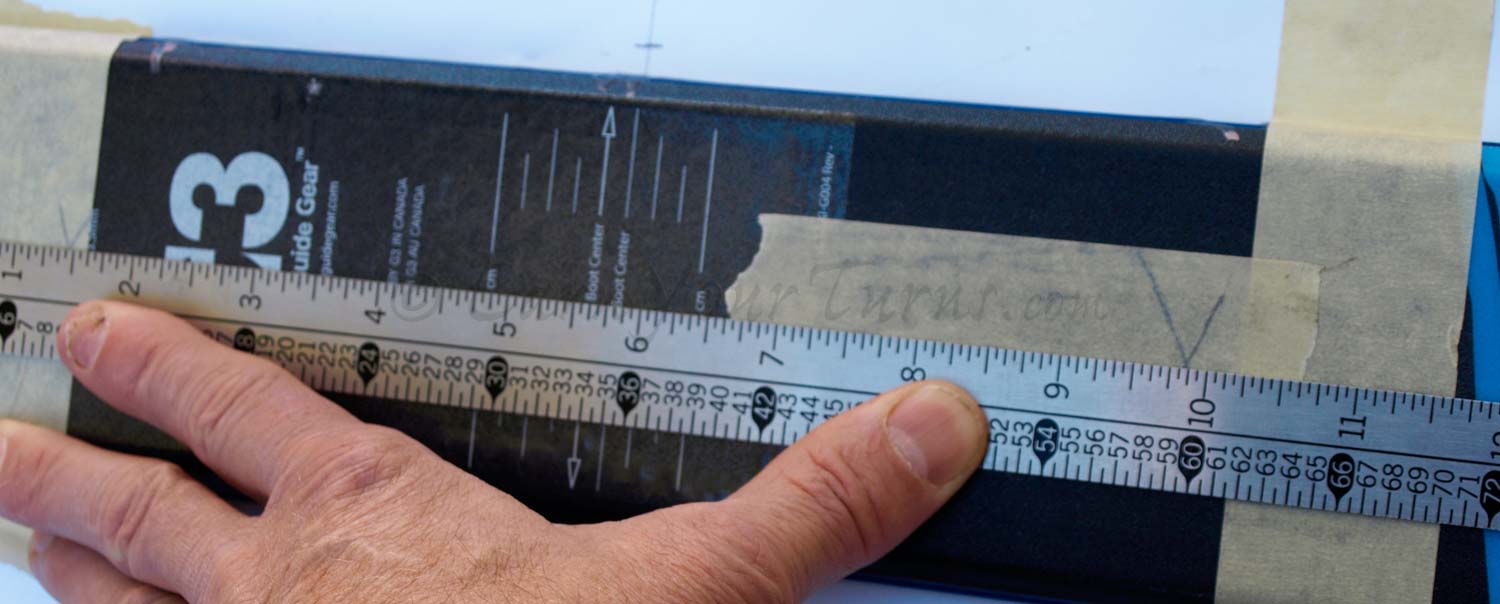
Masking Tape Template
I use the paper jig to give dimensions that are critical, like the position of mount holes relative to ski boot center, then I remeasure and mark them on the surface of the ski. That’s a problem if you want to mark ON the ski surface. It is much easier to simply cover the ski top with masking tape in critical locations and then make marks on the masking tape with pencil. If you get it wrong, rip it off and start again.
How do you know if it’s wrong? You used the Carpenter’s Rule and caught it when you measured again, just to be sure. Masking tape is too easy to write on for transcribing locations and the perimeter of parts for alignment.
Key Lines
Ski Boot Center
Make sure you have a ski boot center mark on your boot, and ski. If you do, line ’em up, then put down a strip of masking tap from in front of the boot to a bit behind the heel with a longitudinal strip down the center of the ski. You don’t need to be perfect here, you’ll draw a line later that is the exact center line.
Then place horizontal strips of tape where the toe and heel pieces are roughly going to be. Now you’re ready to start marking.
Don’t have one or the other ski boot center line? With an alpine boot, simply measure the distance between the toe and heel, and mark the halfway point. For a tele boot, measure from the 3-pin line back to the heel, then mark half the distance forward from the heel.
For a ski, you either must find where the ski boot center is located according to the manufacturers available info (on the ski or on their website), or used an old fashioned guess using the balance point or chord center, then adjusting to your whim. The balance point is just what it sounds like, the point where a ski suspended at one point will balance and lay level. Chord center is the center point in a straight line between the raised tip and the tail of the ski. In the days when tele bindings were mounted with pins on chord center, we found that 1-2cm forward almost always yielded better results. This also tended to coincide, within 5mm, with the same mount point as using ski boot center as recommended by alpine ski companies. So now you can interpret to your hearts content how to implement that. As I said, adjust to your whim and hope you like it. You probably will.
Ski Centerline
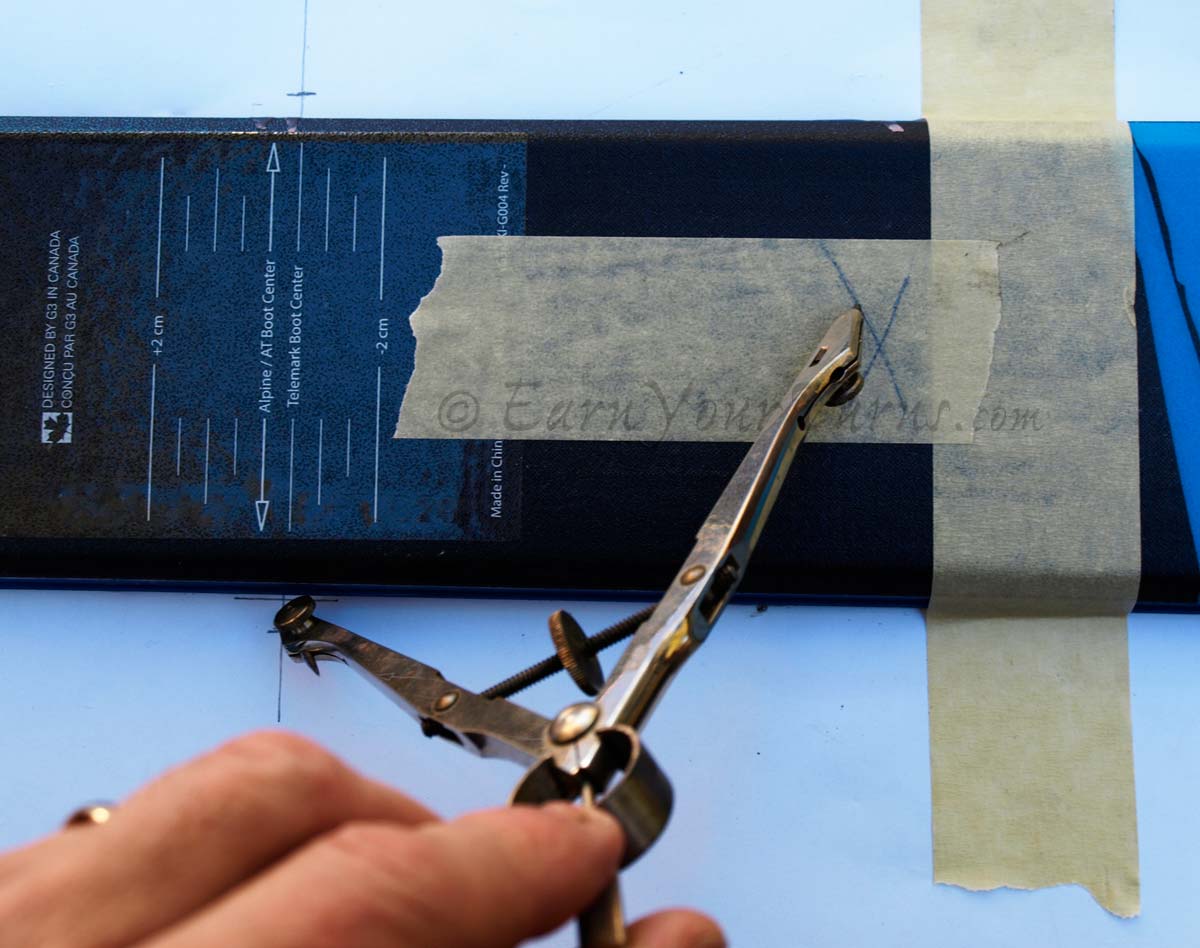
Scribe a semi circle, front and back, from both sides of the ski along the boot center line.
Don’t have a jig with centered holes? Use a compass to determine the centerline. From the ski boot center line, scribe a line on the tip and tail side of the ski, from both sides. Where the scribe line intersects from each side will be the center point of the ski at that position. Now connect the dots and you have a longitudinal center line to align bindings off of.
Mark a line down the middle, connecting where the arcs intersect at the toe and heel.
Drill straight, you’re great
Black Diamond has some great advice on making a solid mount that will hold even the notorious O1 telemark binding. A key part of that advice is drilling straight down, perfectly perpendicular to the top sheet. The best way to insure that is with a jig. Binding Freedom makes a great freehand jig to help make sure you’re going in straight. It requires careful alignment and a C-clamp or two, but it will give consistently good holes. A drill press is another stellar option, if you have one. Or you can eyeball it – if you’re good and feel lucky.
Tap the holes
Double check what the thread size and pitch is for the screws you are using. The standard ski screw thread is ST 5.5×1.8 (ISO1478); translated that means a Self Tapping screw, 5.5mm in diameter, 1.8mm spacing between the treads. Tapping is one of the keys to a solid hold on the ski. Tapping cuts the cylindrical surface of the hole to match the threads of the screw which, when combined with glue, will maximize retention to prevent the screws coming loose.
I just use the actual screws and just go in slowly but firmly about 3 threads deep to do a pressure tap on each hole in the core, then back it out. After that I squirt some glue in the hole. In the case of epoxy, I used a nail to push it in and wipe it around on the threads. It never feels well distributed like squirting in glue, but, when these steps are followed, I’ve never had one fail either.
Glue
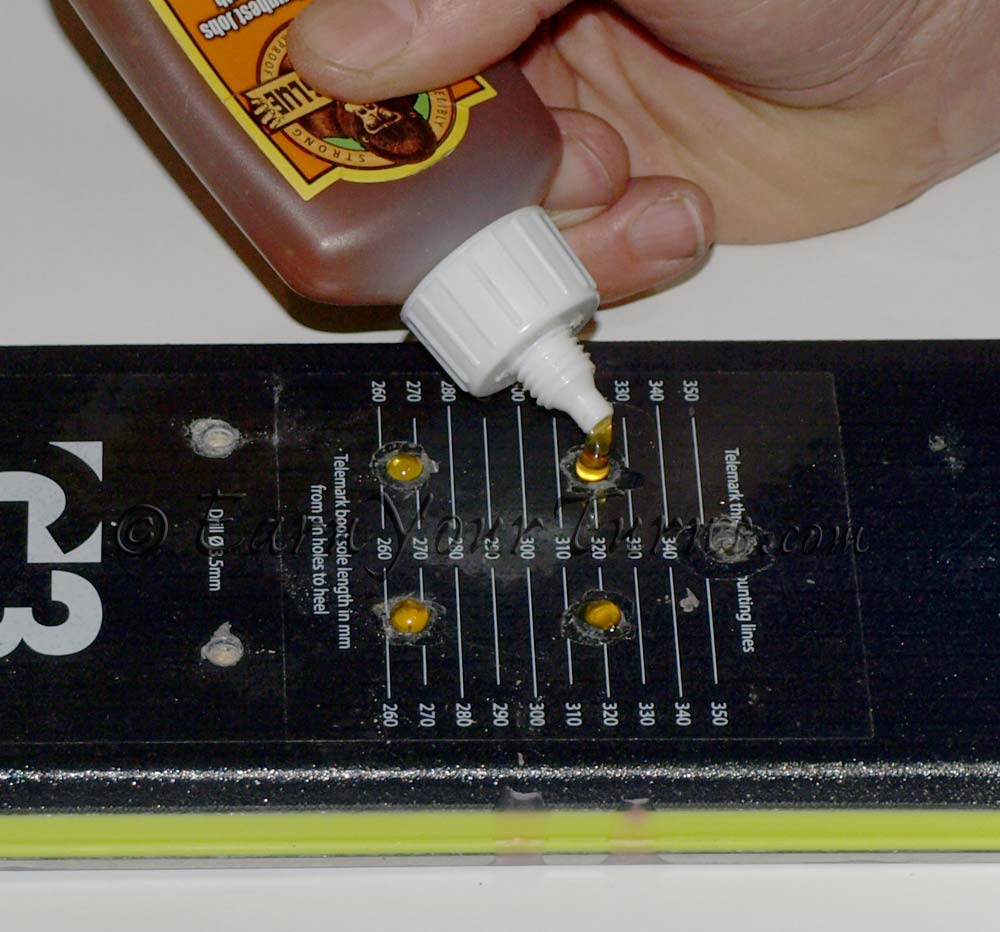
Wood glue, Gorilla glue, or epoxy. Add after you tap the holes.
Honestly, if you need real retention power, the kind that keeps the repetitive nature of the tele turn in check, or simply holds when wrecking the landing of a 30-footer, use epoxy. It is absolutely stronger, all other parts of the mount being equal. For tele I recommend inserts on the load bearing screws behind the cable pivot. Use slow-cure epoxy at room temperature. Get those skis out of your frozen garage for the night.
The guys at Voile turned me on to Gorilla glue. Actually my daughter did, but since I didn’t quite believe her, Voile was professional confirmation there was something to her recommendation. It foams up, but that gives it pressure to spread out and cover every square nano-meter of surface area between the screw and core of the ski. It definitely takes more pressure to break the bond compared to wood glue, but less than epoxy.
Screwing down (updated 10mar14)
Give final twist by hand.
How hard is that final twist? It needs to be pretty darn hard. Thomas Laakso, Black Diamond’s ski products manager says, “Downwards force being more than upwards force is critical, and if you don’t, even with epoxy you’re going to loosen over time, degrade the core, and rip out or fatigue the plate in the binding. The problem here is that some ski constructions will create “spinners” a bit too easily if you really apply good torque, so people normally get gunshy here. I say torque as hard as you can, and if you get a spinner, be prepared to put in a heli-coil.” (…end update)
Give the mount 24 hours, especially if you’re using epoxy. Then go see if you can rip it out while ripping it up.
© 2014
6 pings
[…] the average skier, using inserts to mount your bindings is overkill. As long as you do a decent job and put the screws in straight, with a dab of wood glue to seal and bond the screw, you will not […]
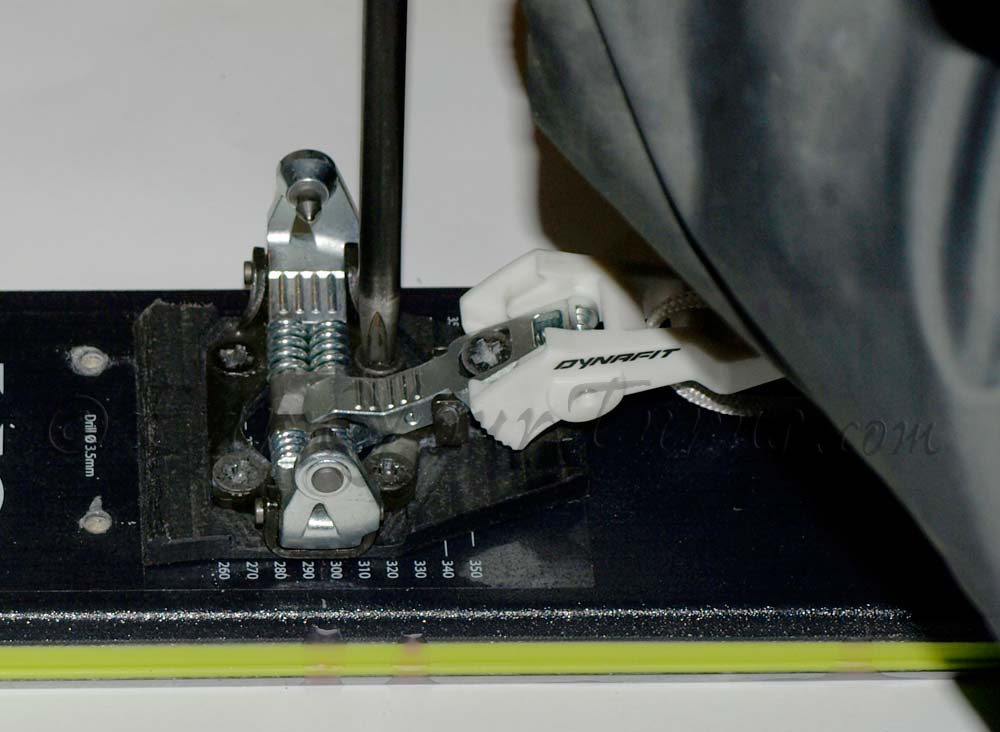
[…] the toe lever, so you can use a Dynafit jig for drilling the toe holes. The heel blocks are easy to mount, even without a jig. Although they are not immune to snow building up underfoot, the newer single […]
[…] your ski for drilling. Even with these convenient templates I would be remiss to not remind you the Carpenter’s Rule still rules, and only caution users to double-check that they set an accurate, precise center line […]
[…] DIY: Mounting ski bindings […]