Crispi NTN duckbutts come up short!

Crispi sz small NTN sole is approx 2mm shorter than Scarpa TX (same mondo size - 26).

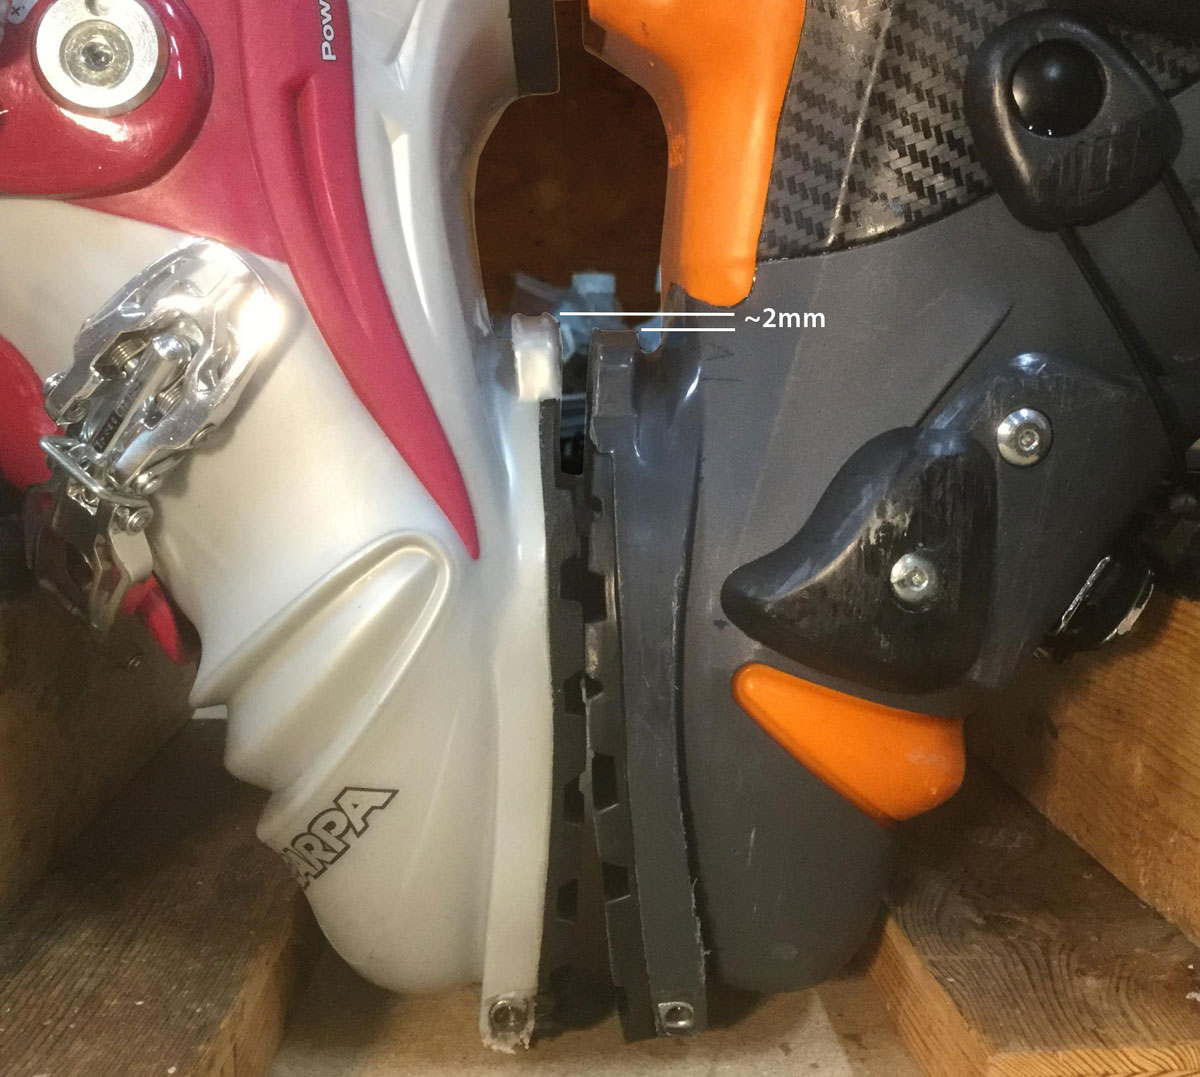
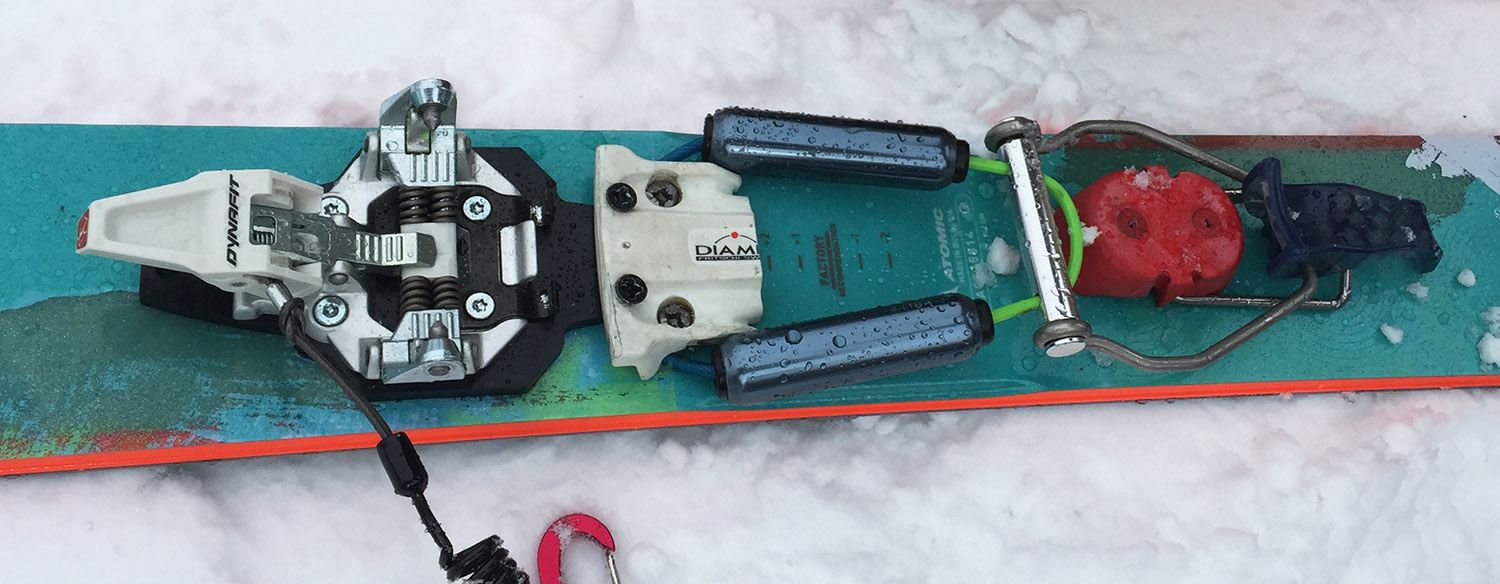
Crispi sz small NTN sole is approx 2mm shorter than Scarpa TX (same mondo size – 26) Photo by SkinnyG.

It appears there is a problem with NTN boots from Crispi; not all, but enough to give a warning. The second heel might be too small, meaning the distance from the toe-to-the-duckbutt is too short. The result is a loose, or unreliable connection with Meidjo and Outlaw bindings. At this moment there isn’t any reliable data on how widespread this issue is, but the nature of the problem is clear, out of spec boots from Crispi. While the problem has been noted by both 22 Designs and The M Equipment, apparently new Meidjo v2.1 springbox is slightly different than v2.0 and more prone to exhibiting the mismatch.
Keep making backcountry turns

Serial Heelers 2018 tele ‘ddiction

As ski porn goes, the formulas get old but the temptation in the footage keeps the dream of getting away alive. Here’s 15 minutes of powder porn from the dead telemark society — free.

Keep making backcountry turns

Review: Scarpa’s TX-Pro (2017)

Odds are that if you’re a decent telemark skier, you will love Scarpa’s TX-Pro (2017). The reasons are simple, and with a little investigation and analysis, obvious. The TX-Pro simply nails the peak of the bell curve of what the majority of tele skiers want: a boot that is big enough to deliver plenty of power, but isn’t excessively stiff AND, best of all, has the ability to fit a wide range of foot sizes and shapes thanks to Scarpa’s trademark instep buckle.

Men's and Women's TX-Pro

Men’s and Women’s TX-Pro

If you don’t like the TX-Pro it is because you’re on the edges of the bell curve, not the middle. This could be with respect to whether you want a stiff or soft boot, or more practically, the shape of your foot. If you want extra stiff, TX-Pro simply isn’t; nor is it soft.
Keep making backcountry turns

Beta report: 22D’s Lynx 2-pin tele binding

Last season 22 Designs introduced Lynx, their next generation 2-pin telemark binding. With that introduction the classic beta program was eliminated and 22D took orders in mid-October 2018 for a limited production run of only 500 pair. I was privileged to be one of the beta testers this past season which resulted in some moments of frustration that ultimately contributed to refinements in the first production models.

Lynx v1 - 22 Designs 2-pin tele binding. Stop drooling.

Lynx v1 – 22 Designs 2-pin tele binding. Stop drooling.

If you’re not already on the list to receive a pair, don’t worry, next year’s version will be better and you can thank the mavericks on the bleeding edge of tele development for putting up with any first-gen shortcomings.

Keep making backcountry turns

2-pin Tele Springs: Size Matters

Size matters. J Nicol checks to see if these springs measure up.

Size matters. J Nicol checks to see if they measure up.

While the effect of cable pivot location tends to dominate the sensation of a tele tech binding, the next strongest binding component of the tele sensation comes from the springs used. To some extent you can trade one for the other; meaning a stiff spring and a forward pivot are somewhat equal to a soft spring with a pivot farther back. It’s not an exact replacement, but more importantly, the further back you put the pivot the longer spring you need so it doesn’t compress too far too fast. Therein lies the limit with a real heel 2-pin tele binding — springs that limit how deep you can tele. So let’s take a closer look at the cable rods, heel throws, and springs.
Keep making backcountry turns

DIY 2-pin tele: Fixing the Cable position

Now we get to the crux of building your own DIY 2-pin tele binding — the cable system. Being satisfied with the downhill performance of a tele tech binding is determined by:

  1. Position of the cable pivot (distance behind 2-pin line)
  2. Connection to the boot (real heel or 2nd heel)
  3. Springs used (stiffness and travel distance)

Mixing up a bit.  2-pins by Dynafit, cable block by Fritschi, BD cable assembly, G3 heel post.

Mixing it up a bit. 2-pins by Dynafit, cable block by Fritschi, BD cable assembly, G3 heel post.


Keep making backcountry turns

DIY 2-pin Tele: Use the Force (Luke)!

Before venturing any further in chronicling tele-tech bindings, it is important to understand the forces at play in a telemark turn. For the average telemarker, this article fits in the too much information category but for do-it-yourselfers, this should prove helpful in determining the critical sweet spot of the cable pivot position.

Activity

The key to control with the telemark turn is balance. Balancing between your two feet when dipping the knee is made easier with a spring tensioned cable attached to the boot. How much that helps, or doesn’t, is commonly referred to as binding ‘activity.’ Charlie Ziskin, a Colorado Front Range tele guru with decades of experience defines activity as “the ability of the binding to ‘actively’ help break the bellows of the boot, so you’re feeling pressure through the ball of the foot, not the tip of your toes.”

The effect of cable tension is a binding that actively helps to flex a plastic tele boot.

The effect of cable tension is a binding that actively helps to flex a plastic tele boot.

Keep making backcountry turns