
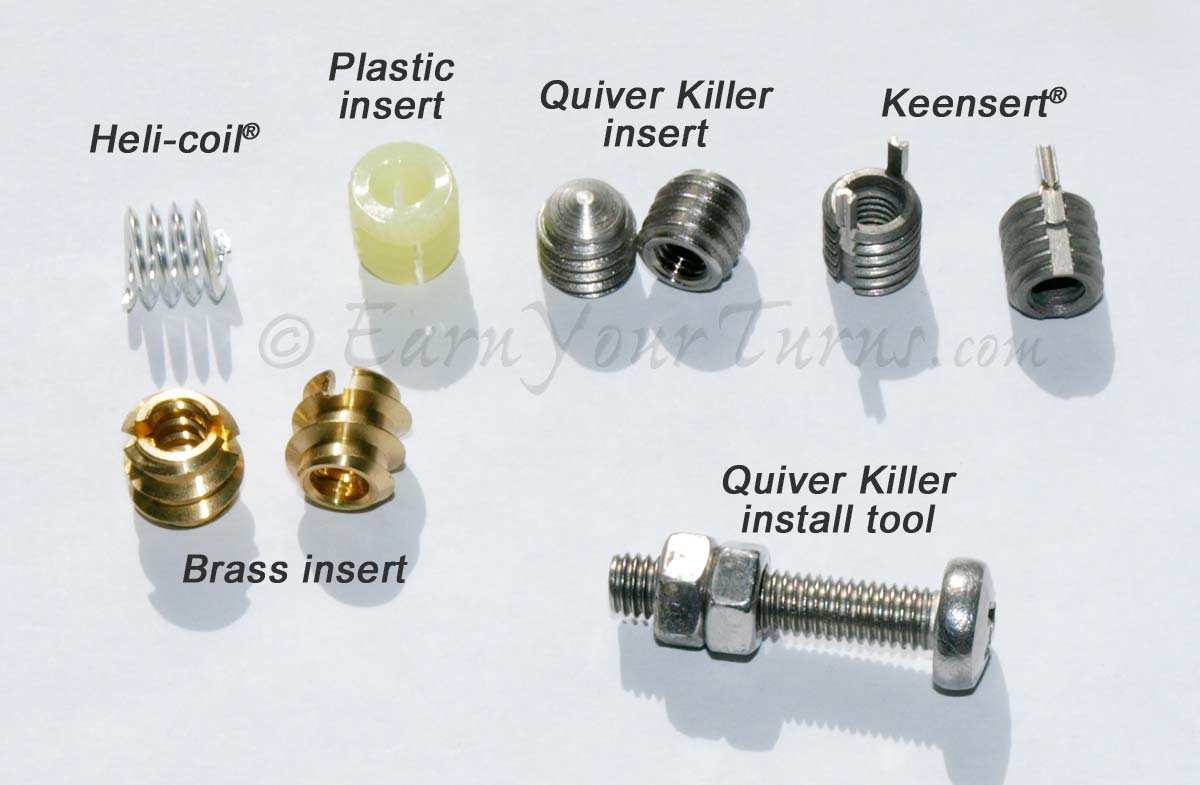
Got inserts?
Inserts are one way to reduce the pulling forces on each screw by increasing the bonding surface area within the ski by using a larger diameter screw, i.e. an insert. This has the side benefit of allowing you to use a machine threaded screw to remove and connect hundreds of times with no loss in structural integrity or the strength of the connection.
Insert Costs

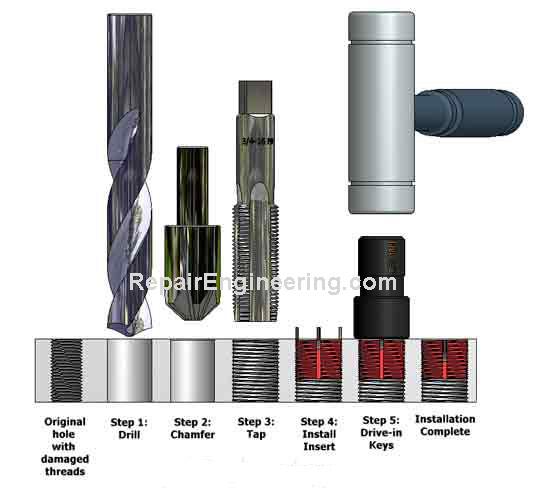
Be sure to tap the over-sized insert hole.
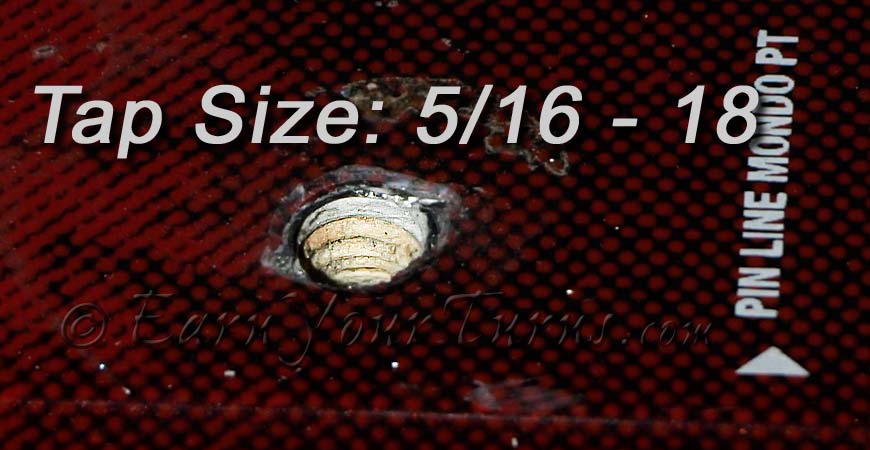
Tapped insert hole ready for epoxy.
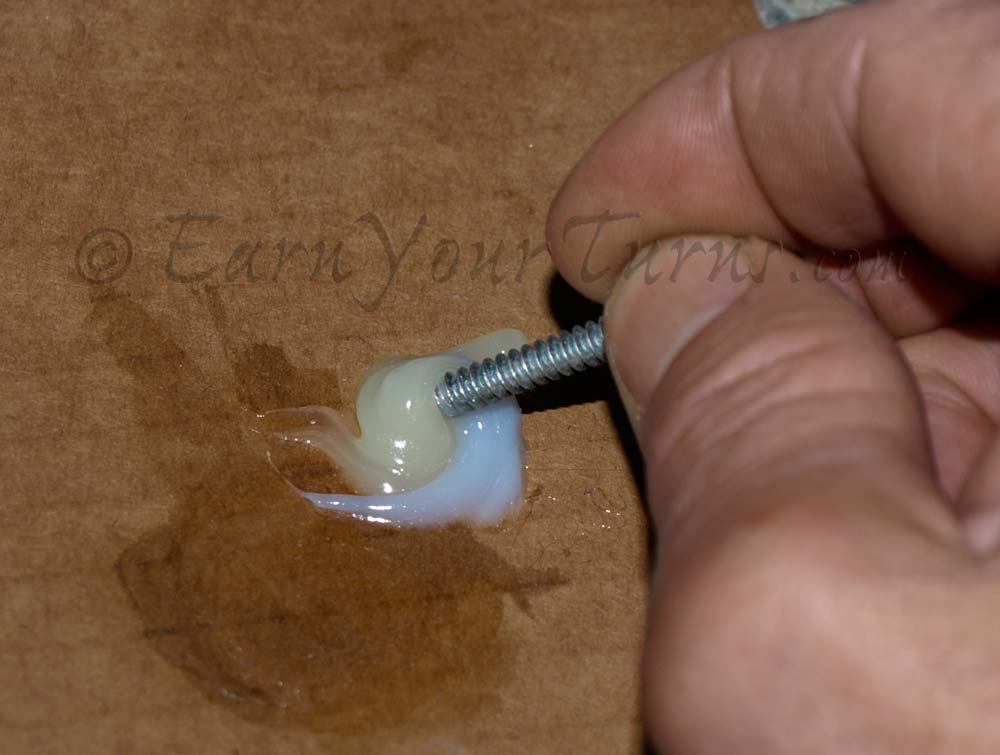
Mix up a slow-cure epoxy to bond the inserts.
Installing Inserts
Precise hole location is critical with inserts. The best way to achieve that is to use a mounting jig. In the absence of that, the reader is advised to apply the carpenter’s rule and proceed with extra caution. If a hole is off-center a bit with the standard ski core material (wood), the error can usually be tolerated, and is self correcting to some extent as the binding is mounted. With inserts that accept a machine threaded screw mismatches between the binding hole location and the insert location allow for very little error.
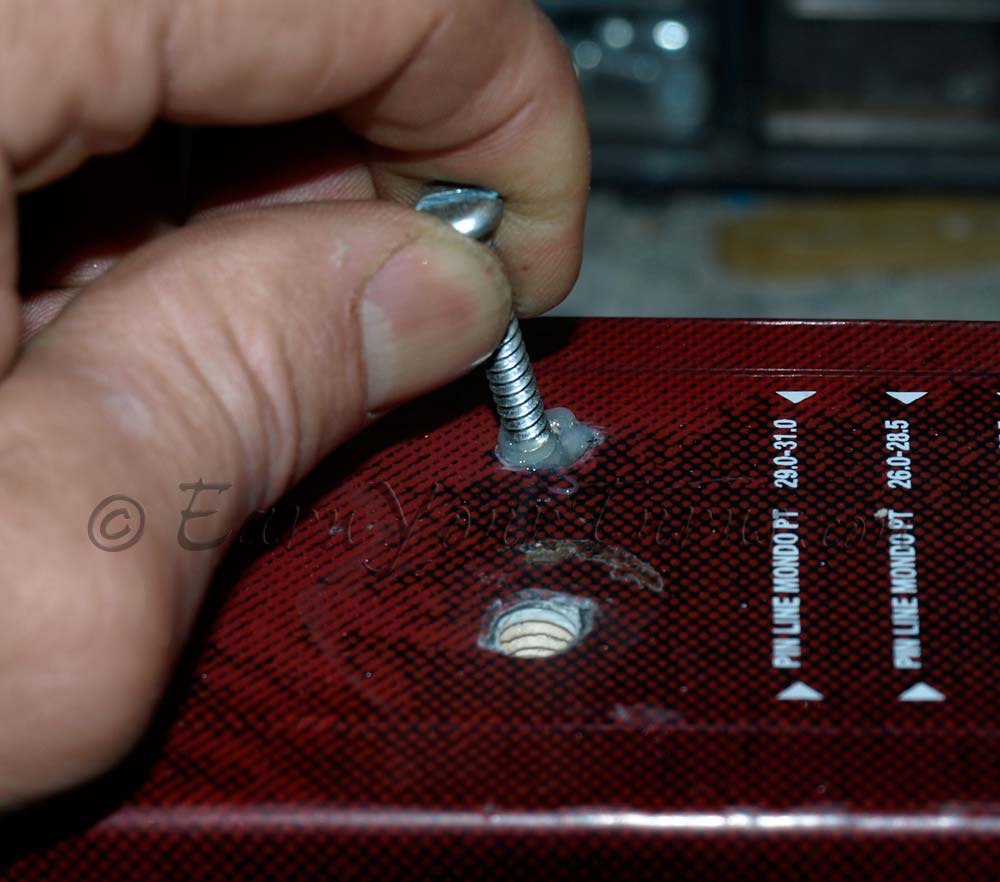
Add epoxy to the hole.
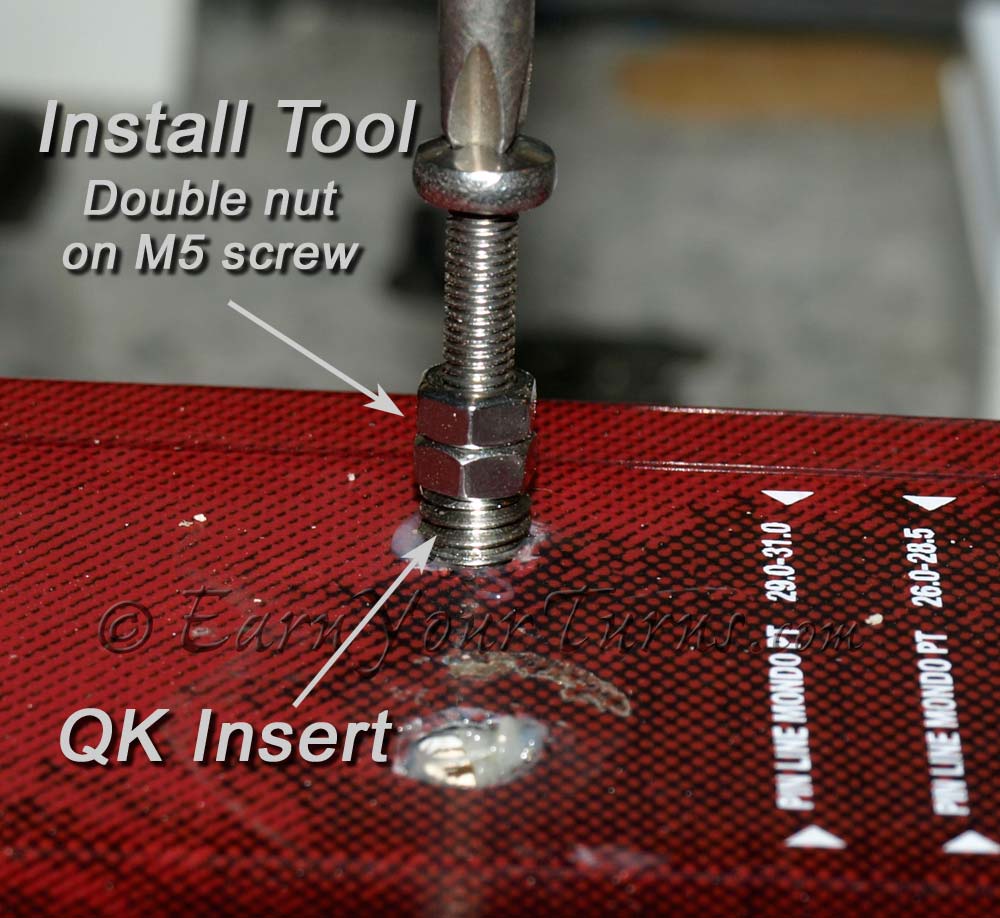
Thread the insert into the threaded hole.
To keep the insert bonded in the hole, fill the threads in the hole with a slow cure epoxy. Then thread the inserts into the holes. Either use a special tool (available from QK or BF) or use a 5mm machine screw using two nuts to lock the screw position on the insert so it rotates with the screw. When the top of the insert is flush, or slightly below the surface of the ski, back the screw out. If the insert still moves with it, loosen the two locking nuts so the screw can move independent of the insert. The beauty of Binding Freedom inserts is you can use a simple flathead screwdriver to thread them in.
After threading the inserts into the holes, let dry for 24 hours, preferably in a warm room, not on the work bench in your cold garage.
Recommended screws
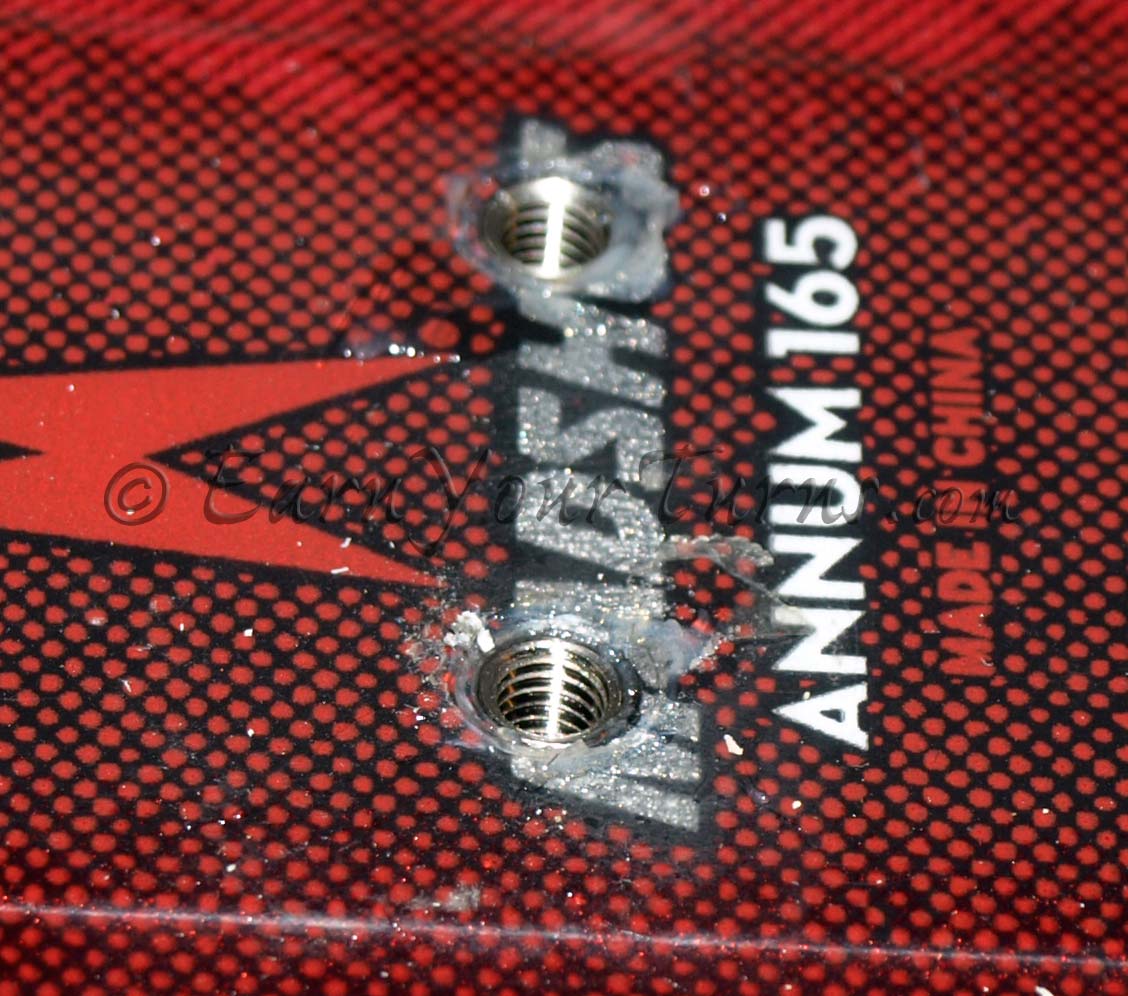
The completed mounting hole, ready to get screwed.
Thread Lock Options
Since this is a metal to metal threaded connection the chance of the screws coming loose is fairly high. Some sort of thread locker is recommended so the machine screws do not loosen from vibration. The most common recommendation is Blue Loctite® — apply the blue goo to the threads and let it dry before threading into the insert. I’ve heard of the blue goo working a little too well causing the insert to be removed when trying to remove the screw down the road. This is probably due to corrosion in combination with the holding power of the Loctite®. Vibratite® is my preferred thread locker. In my experience it will still allowing you to remove it later on, but that could be because I apply it circumferentially so it simultaneously seals out moisture. When I know I’m going to be swapping binding I have been known to use plumbers tape, not because it locks the screw in place, but because it seals out moisture. If you follow my advice with plumbers tape, be sure to check the tightness of the screws regularly and always carry a spare tool in your pack to tighten ’em up in the field.
Testimonial
In my experience I’ve never had a telemark binding come loose when I used inserts on the rear two toe piece holes. I use inserts for all my TTS cable posts to allow for changing cable positions without compromising the strength of the connection to the ski. Inserts are also used on my NTN bindings since different boot models require different sized NTN bindings. With inserts I can swap from a small to a large pair of NTN bindings in less than 10 minutes. That’s a little slower than using swap plates, but a lot lighter.
Related Posts and Links
BCTalk thread on installing inserts
Quiver Killer Inserts
Binding Freedom Inserts
Keenserts®
Aircraft Fastener threaded inserts
BackcountryTalk discussion: Inserts VS Helicoils
Installing Keenserts®
Installing inserts, e.g. Keensert®
© 2014
Recent Comments